> For the complete documentation index, see [llms.txt](https://help.tpwallet.io/en/llms.txt). Markdown versions of documentation pages are available by appending `.md` to page URLs; this page is available as [Markdown](https://help.tpwallet.io/en/wallet-operation/tp-card/deposit.md).
# TP Card Deposit Tutorial
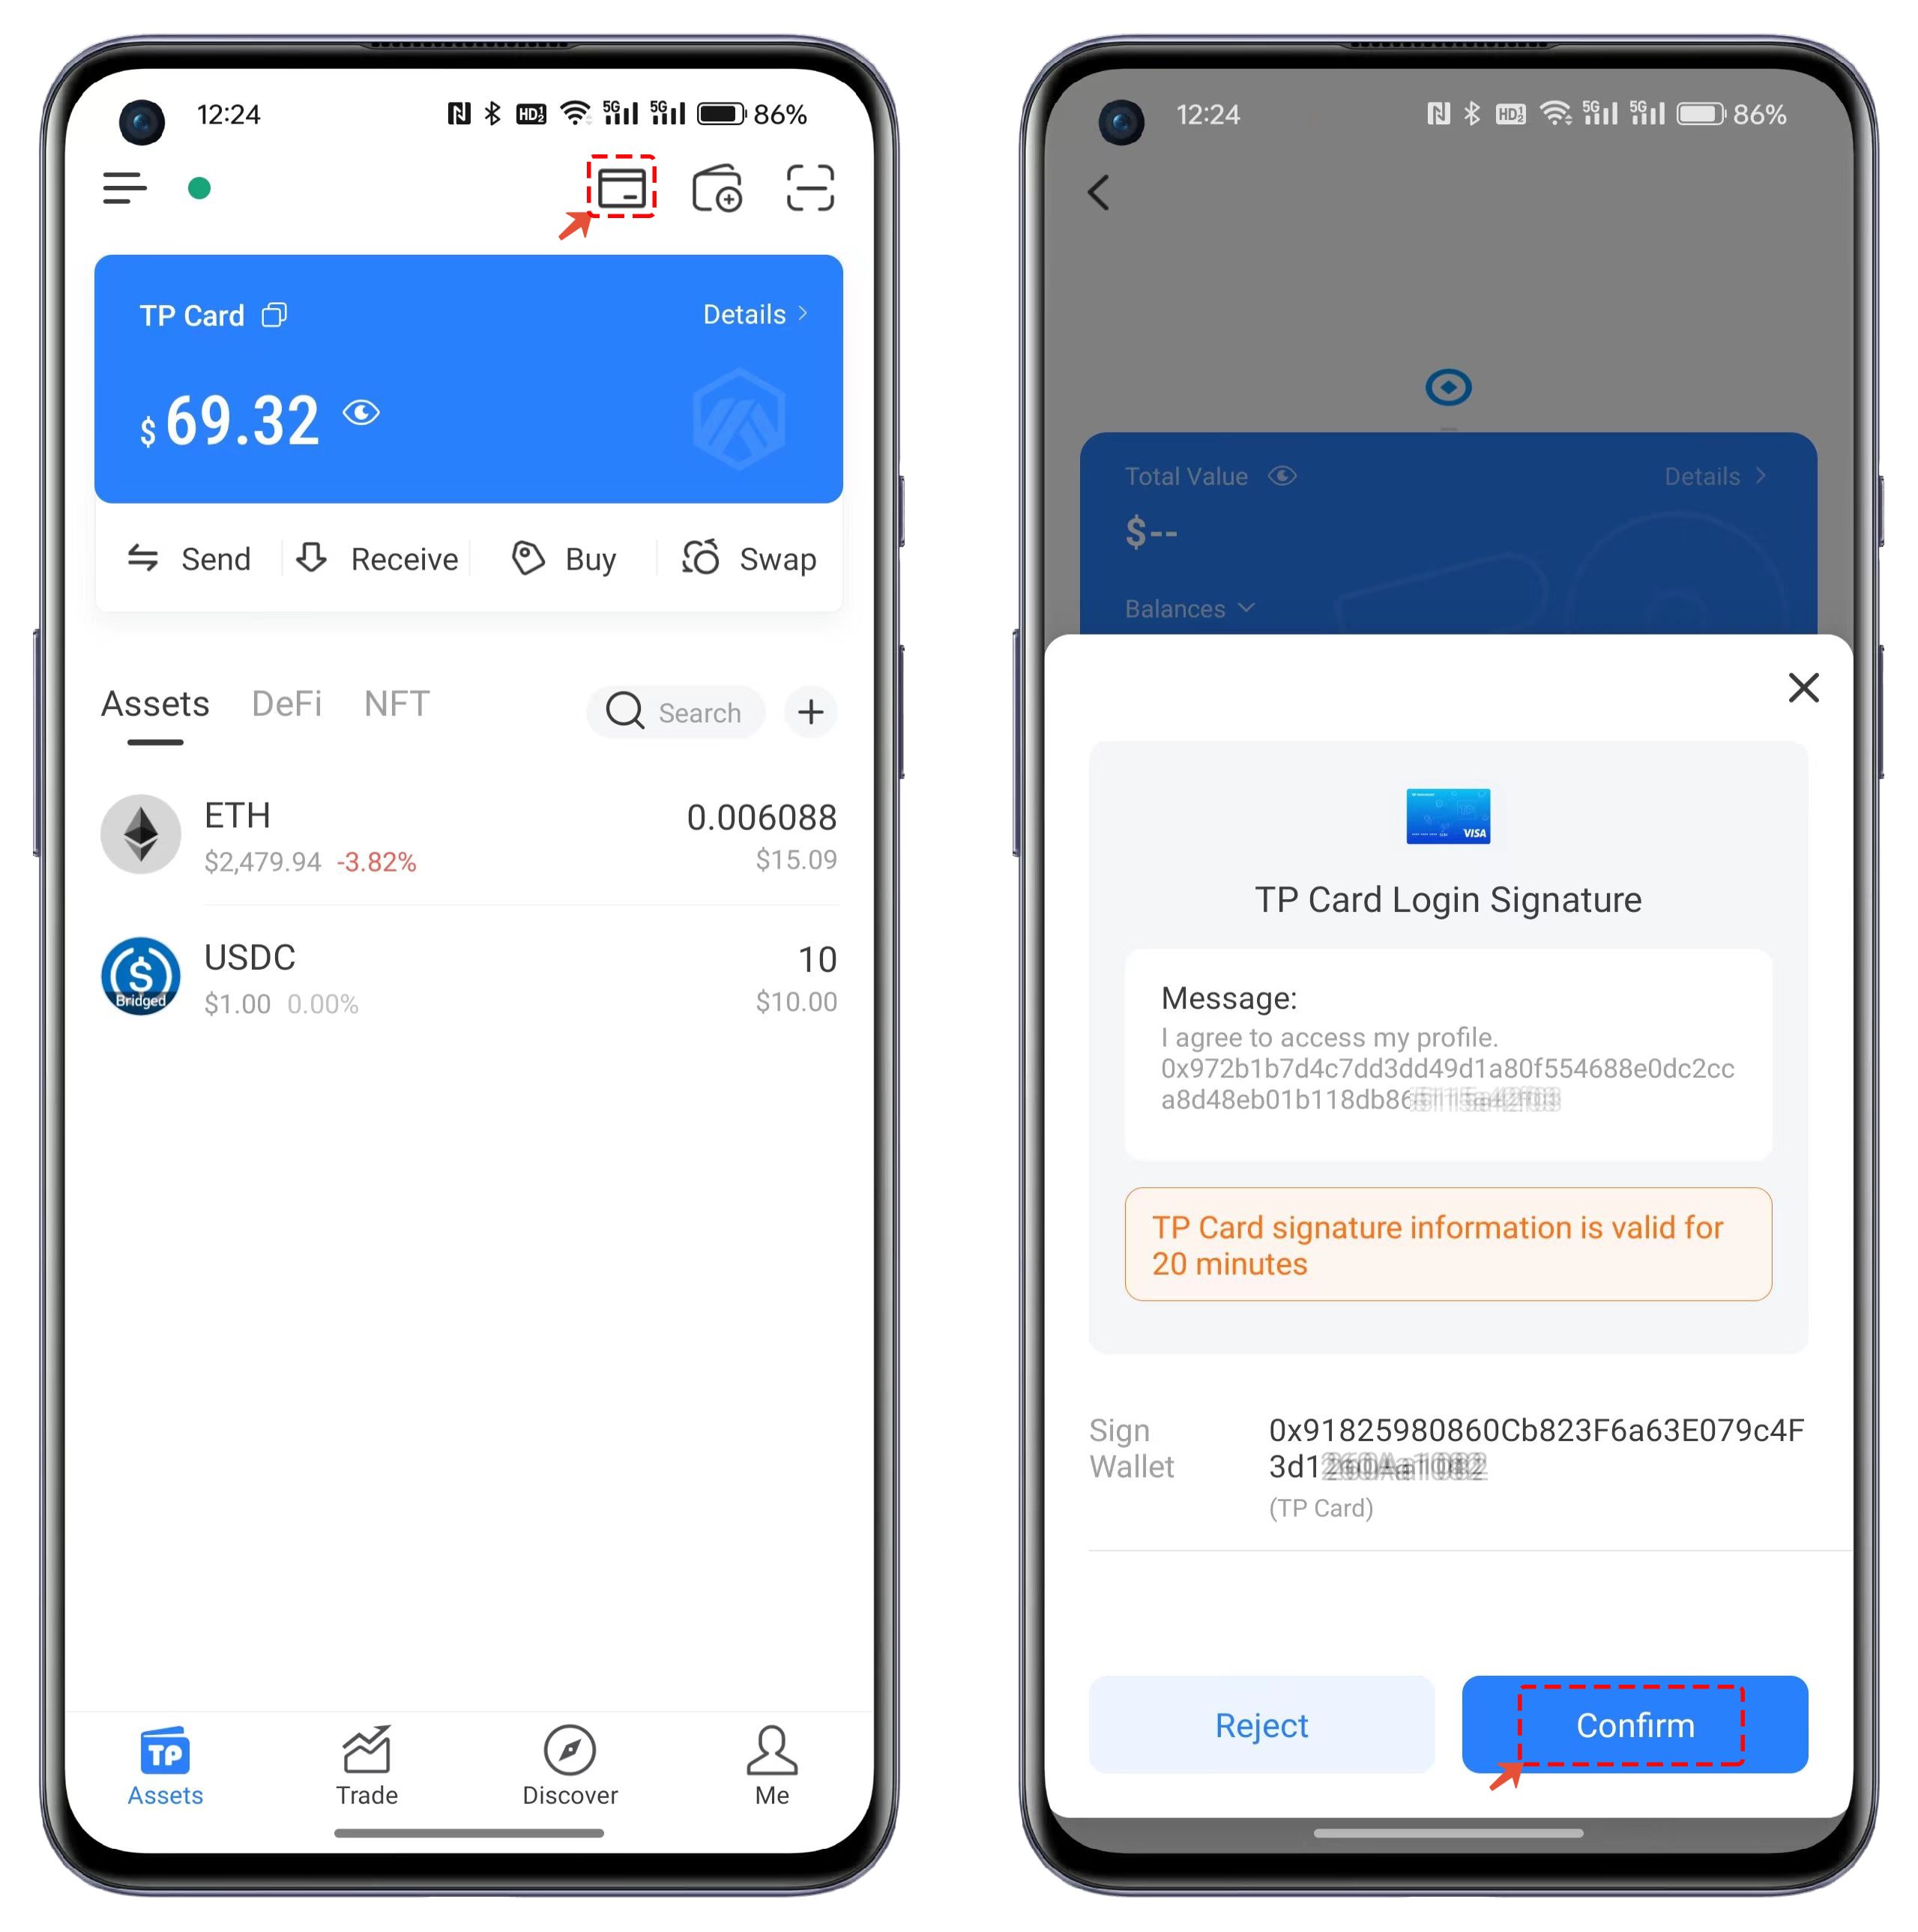
1. Open the Arbitrum wallet in TokenPocket. Since this address is already registered for TP Card services, you will see a card icon in the top right corner. Click on it and proceed with the login signature.
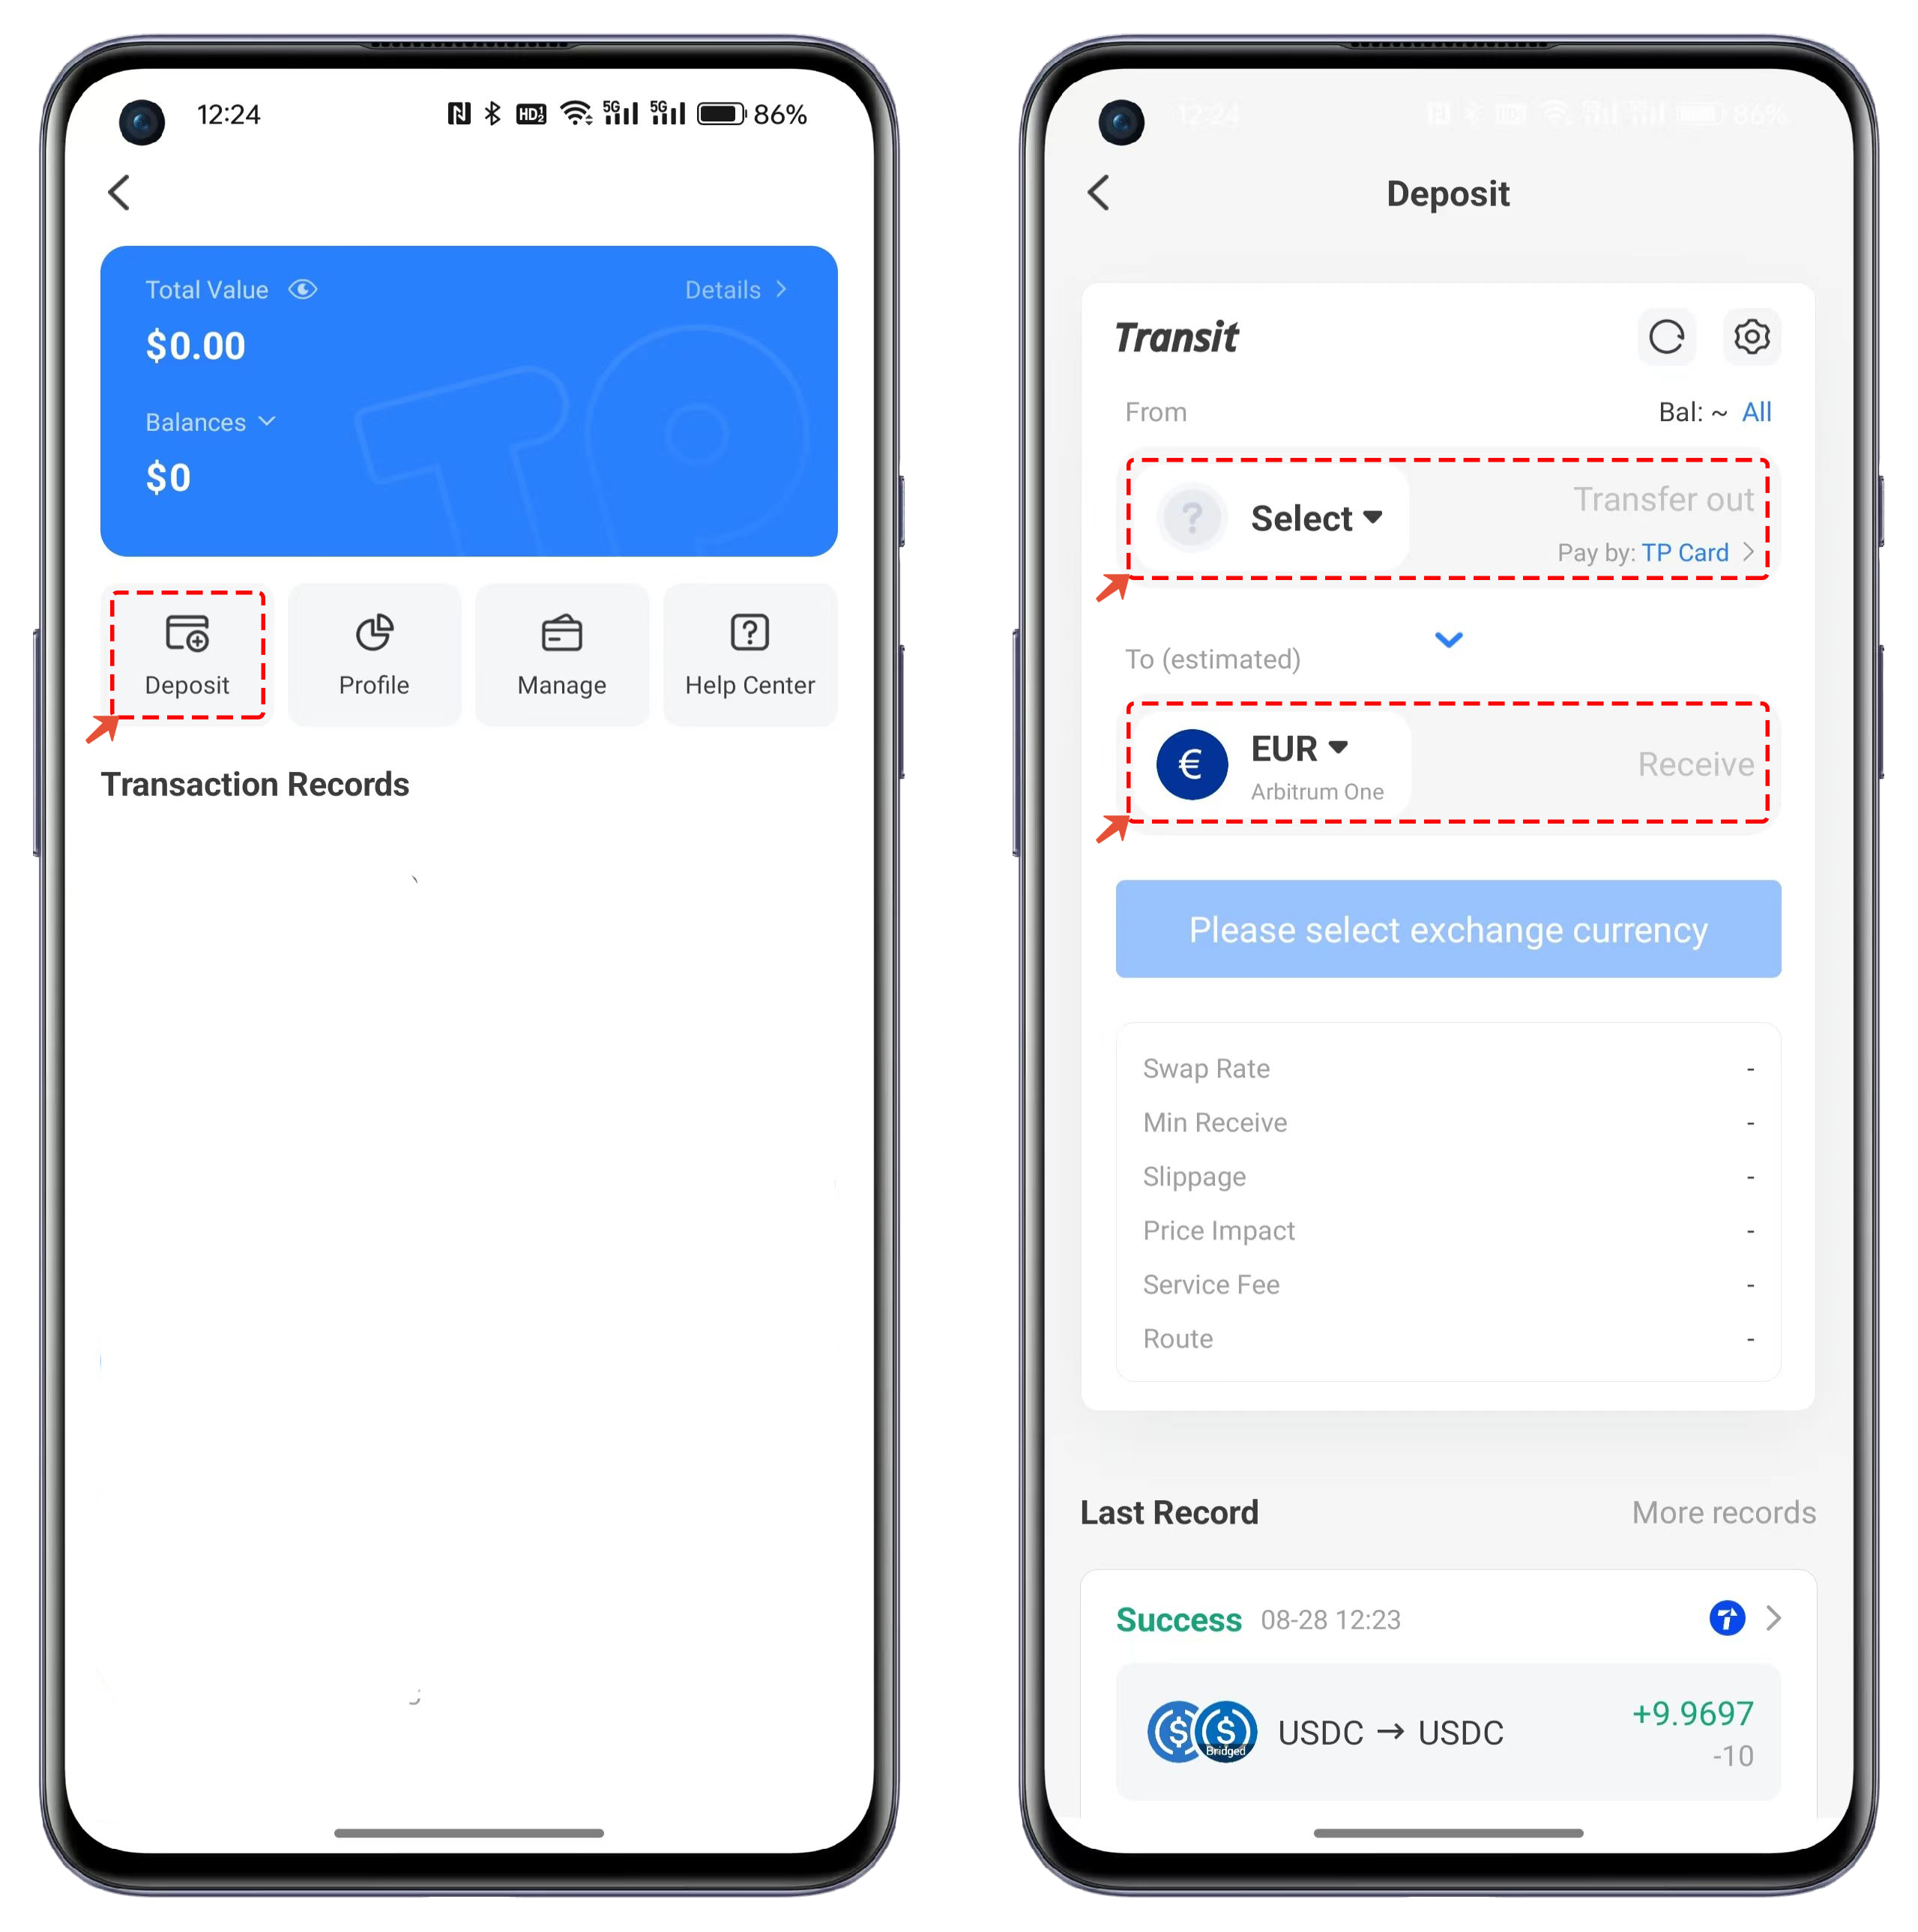
2. After opening TP Card, click on the \[Deposit] menu. In the deposit interface that pops up, you can select the sending and receiving blockchains, tokens, and amounts.
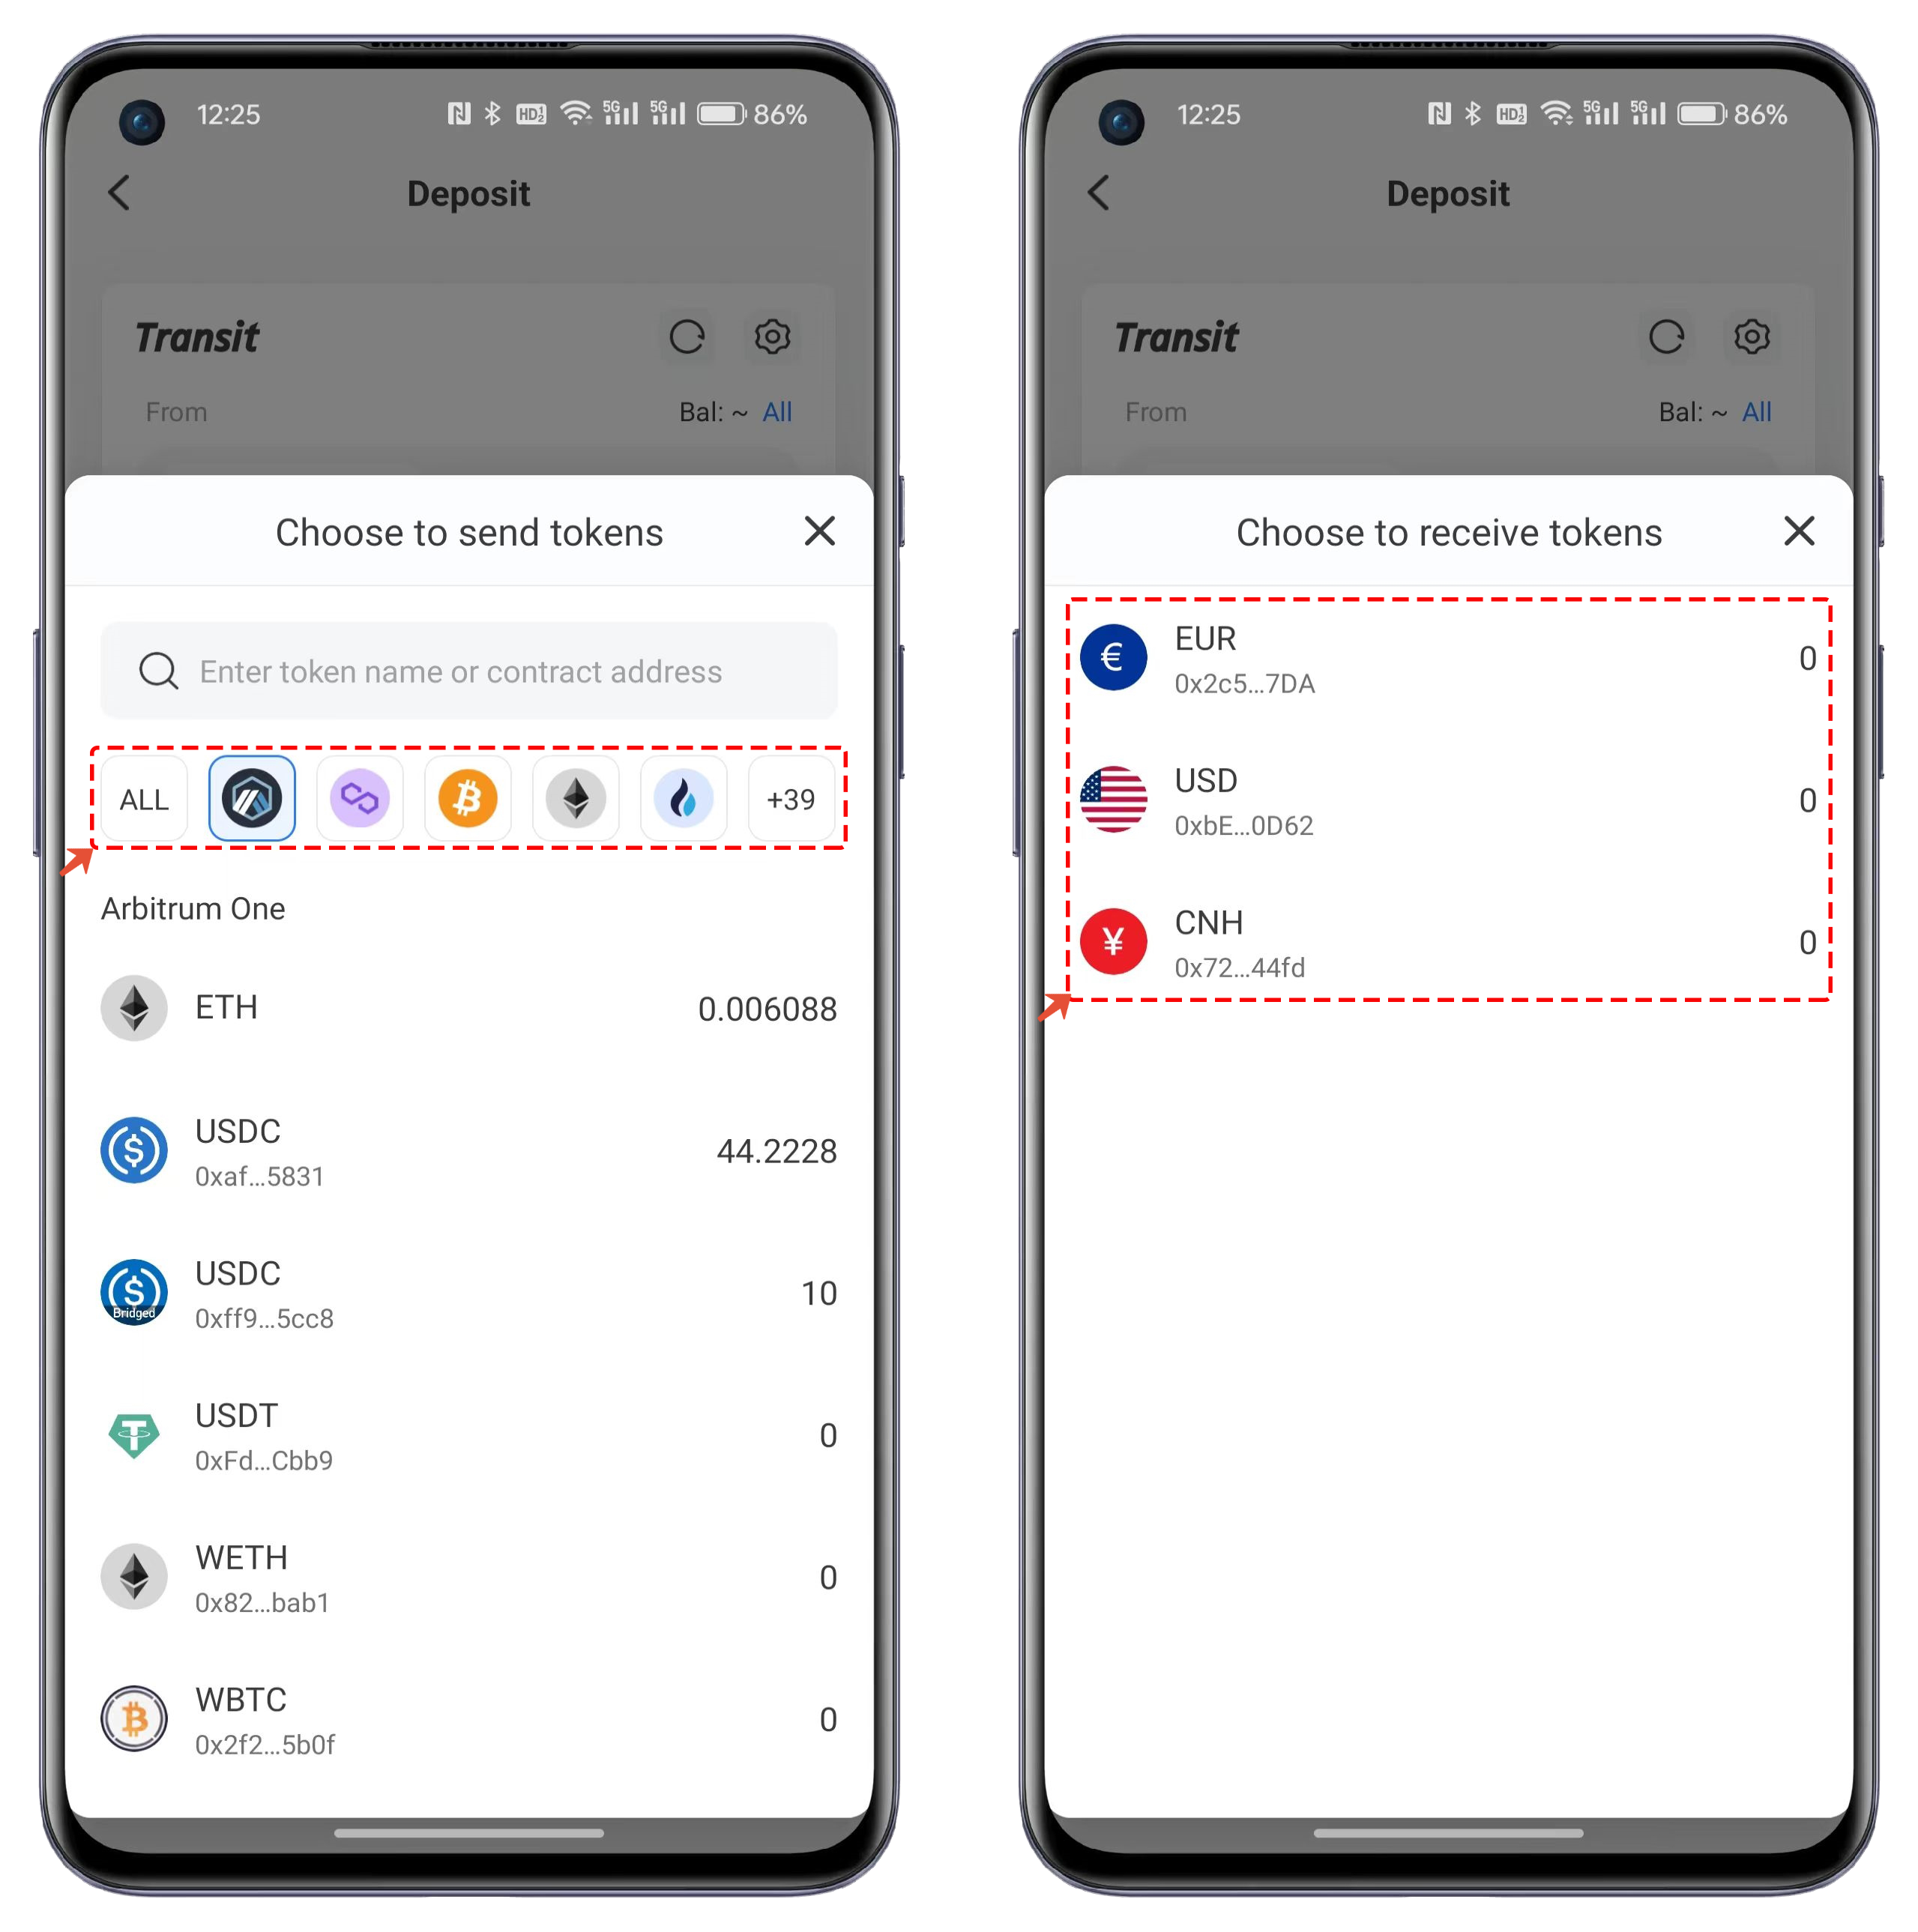
3. In the \[Token List] for sending, you can choose to swap tokens within the same Arbitrum chain or use tokens from other blockchains for cross-chain swaps. In the \[Receive Token] section, you can select EUR, USD, or CNH assets.
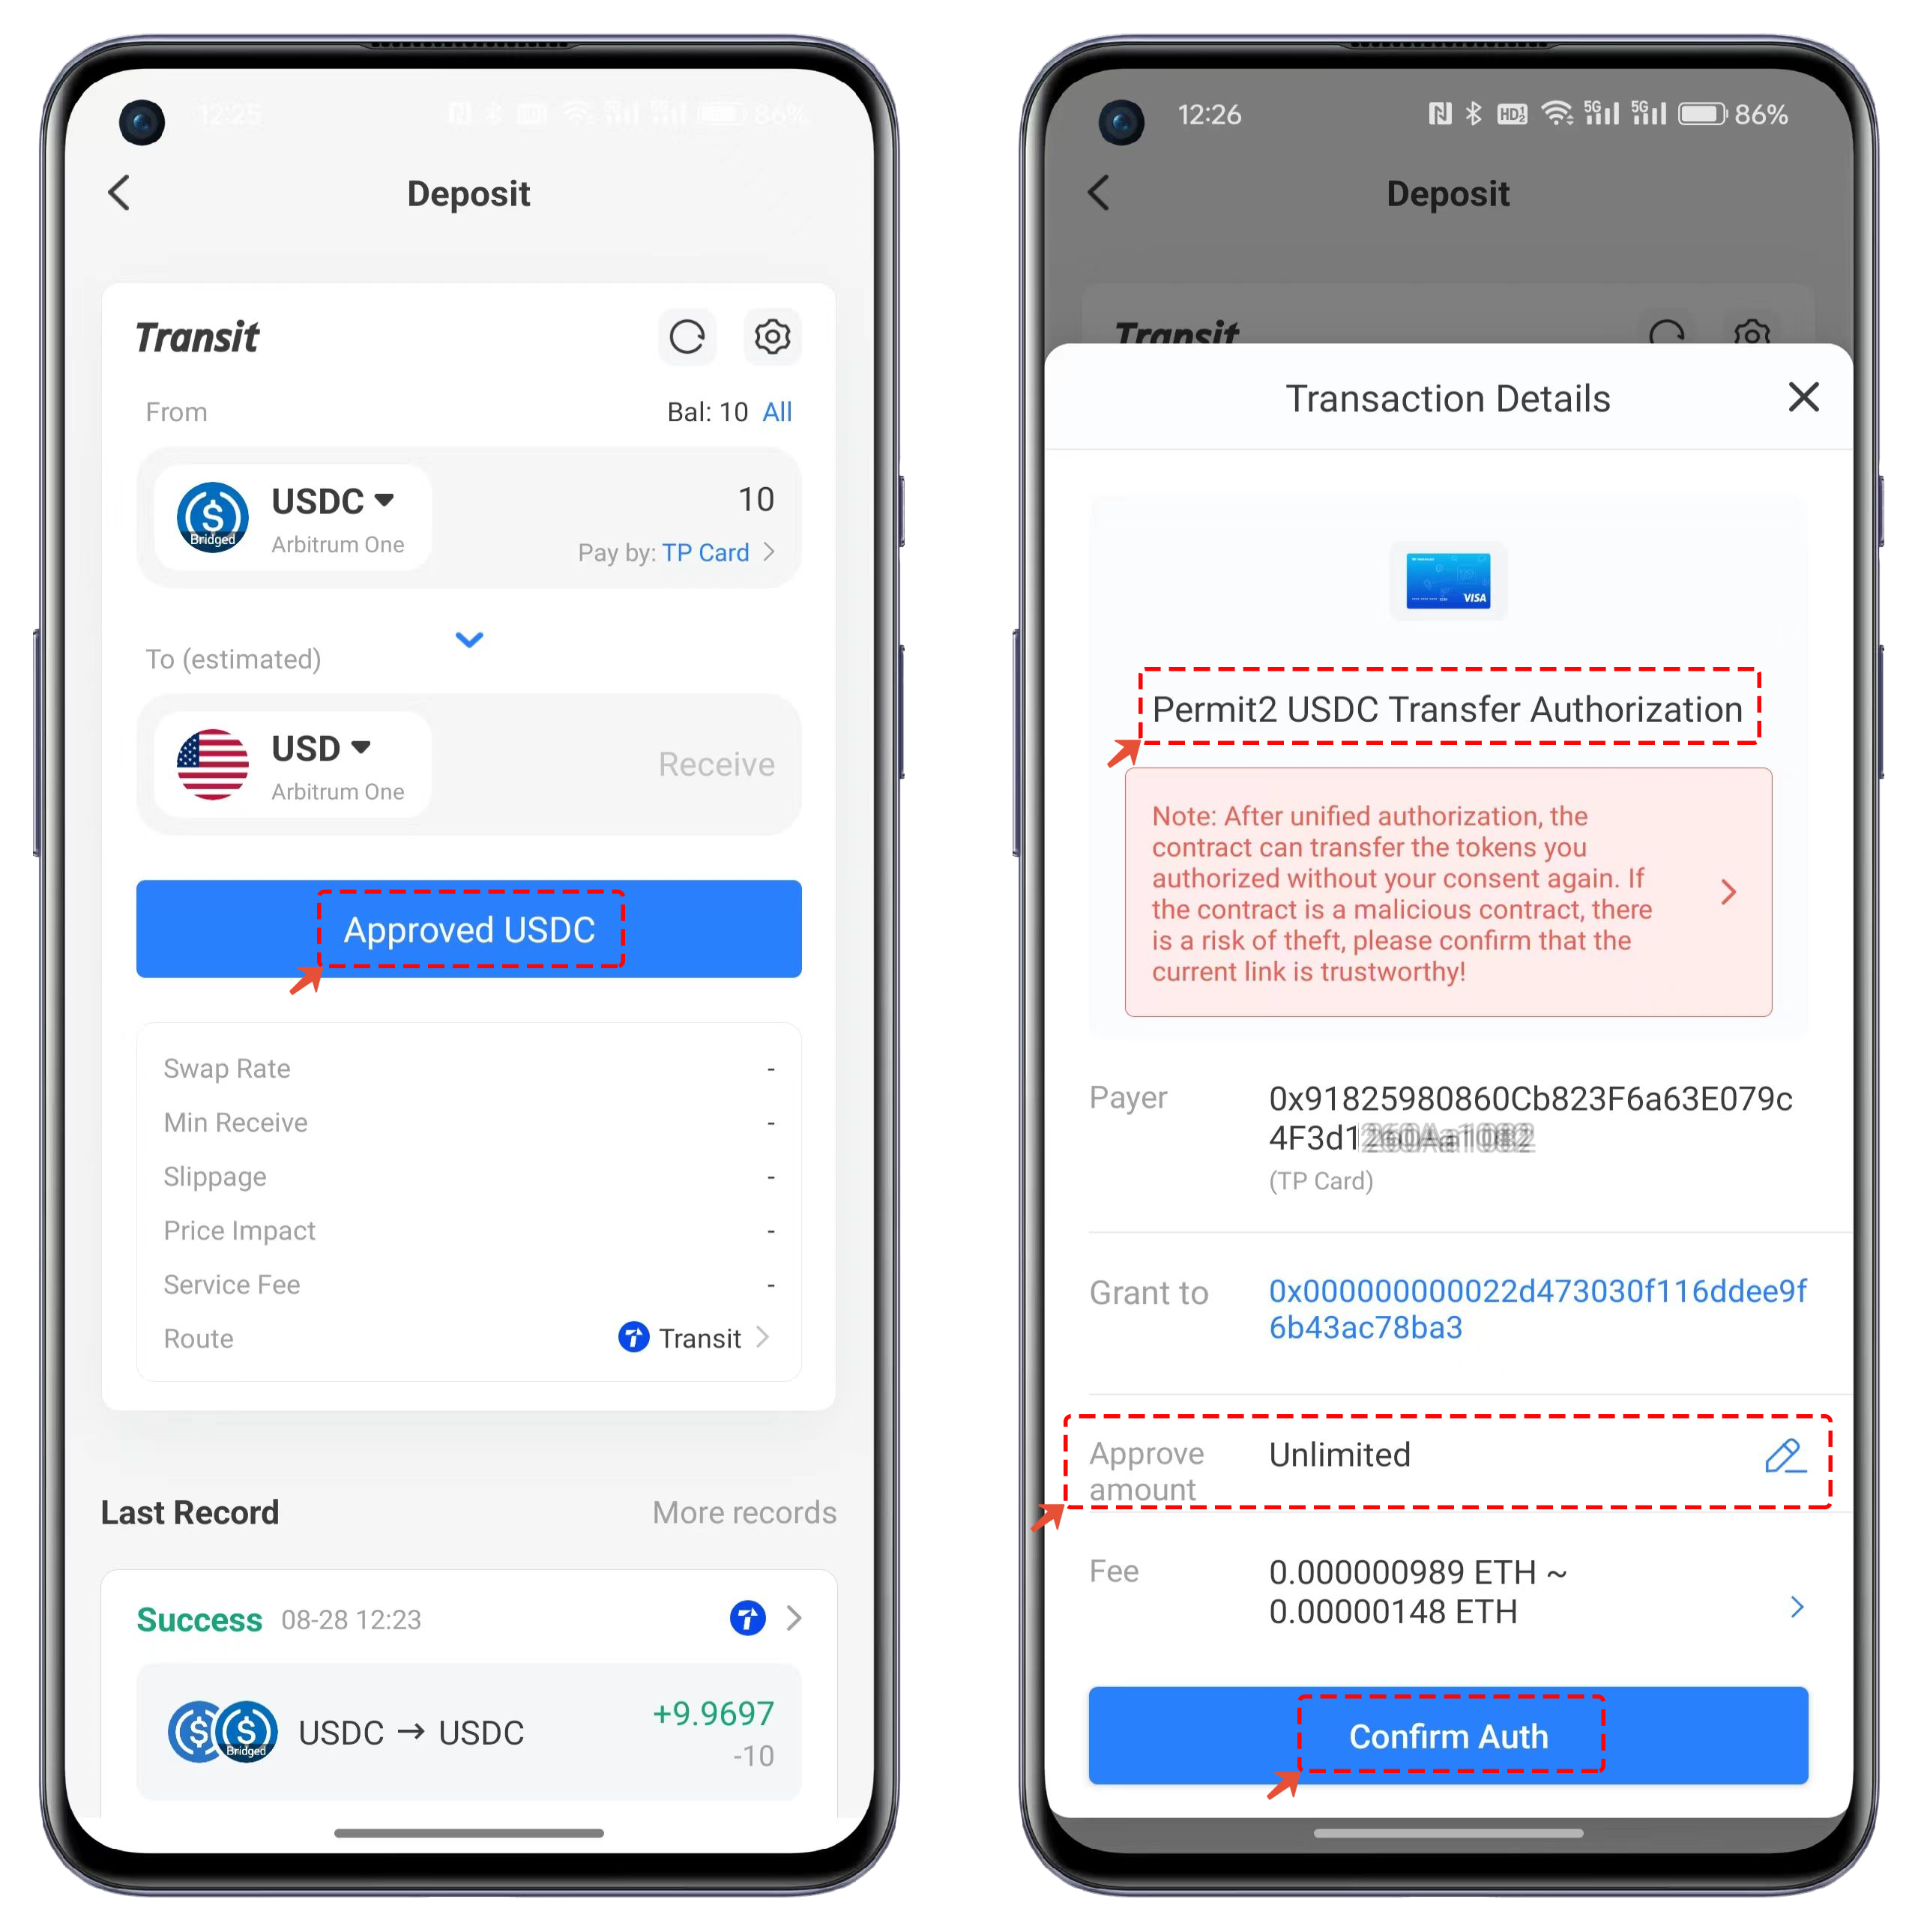
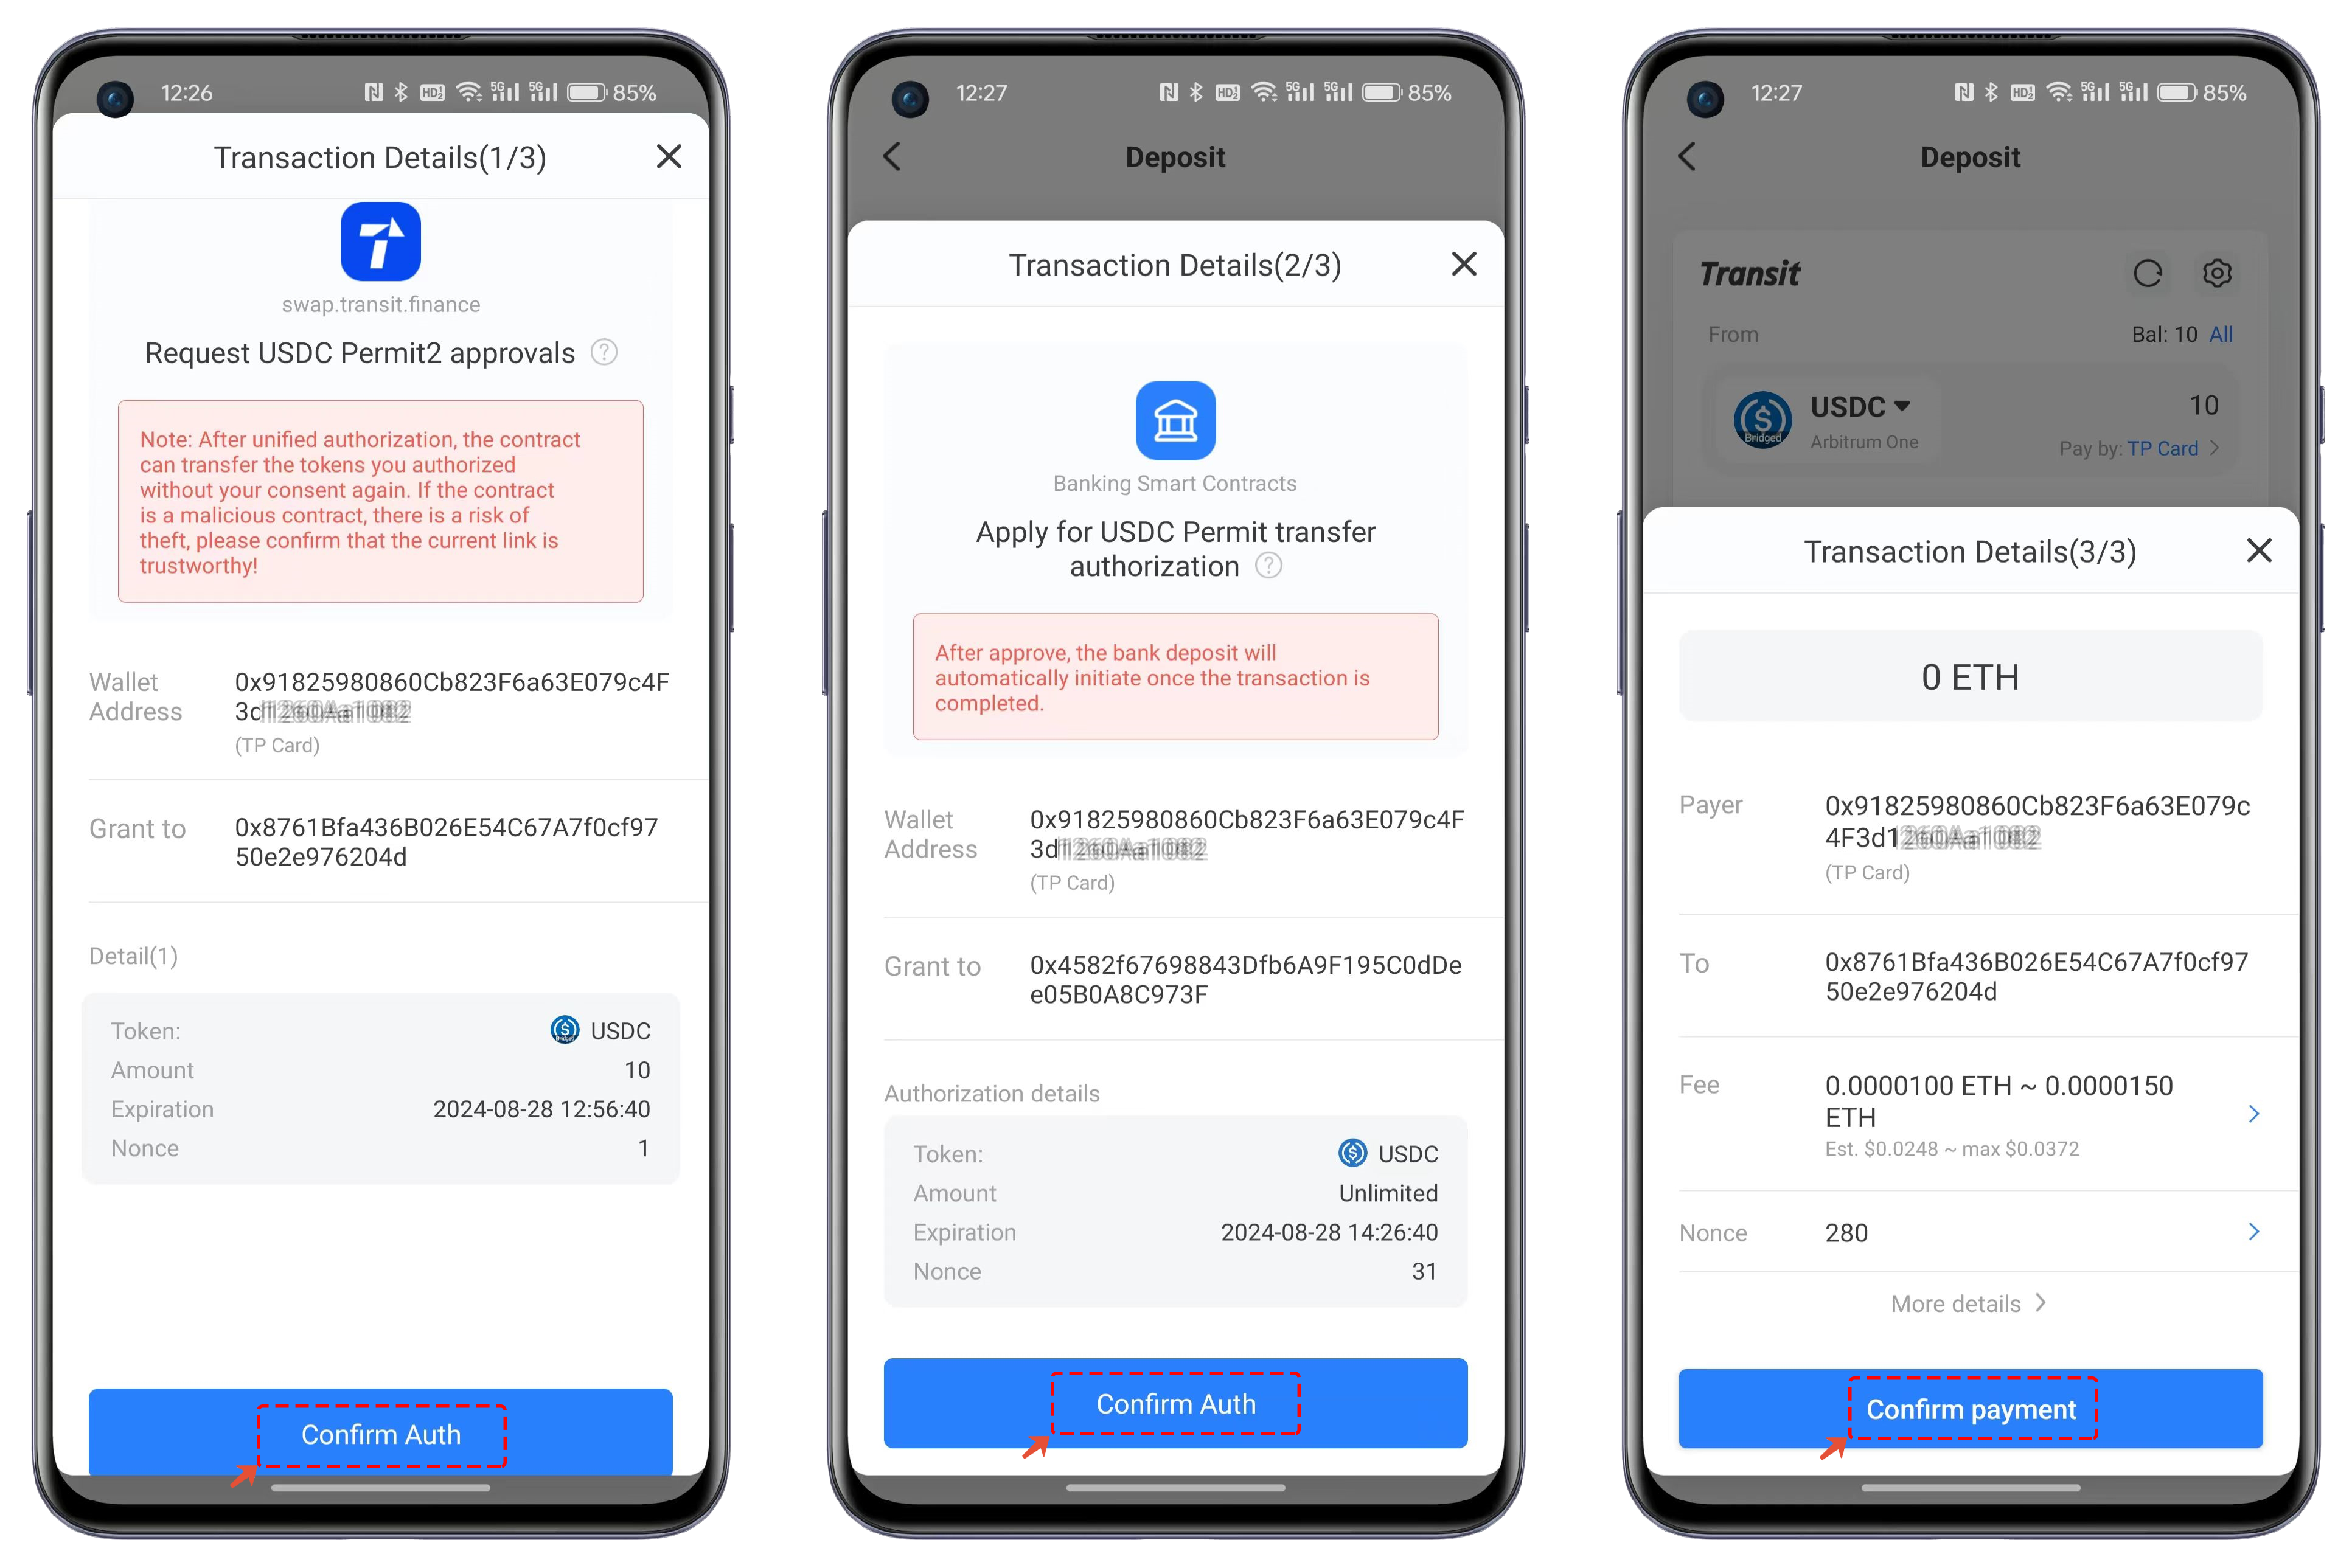
4. When using USDC or other non-mainnet tokens for the first time, you need to perform the approve operation. In the transaction details, you will see the information “\[Permit2 requests USDC transfer Authorization].” You can set the \[Approval Amount] based on your preference. Finally, click \[Confirm Auth] to complete the approval process.
5. After completing the authorization process, continue with the swap. You will need to perform three actions: two off-chain authorizations and one on-chain confirmation.
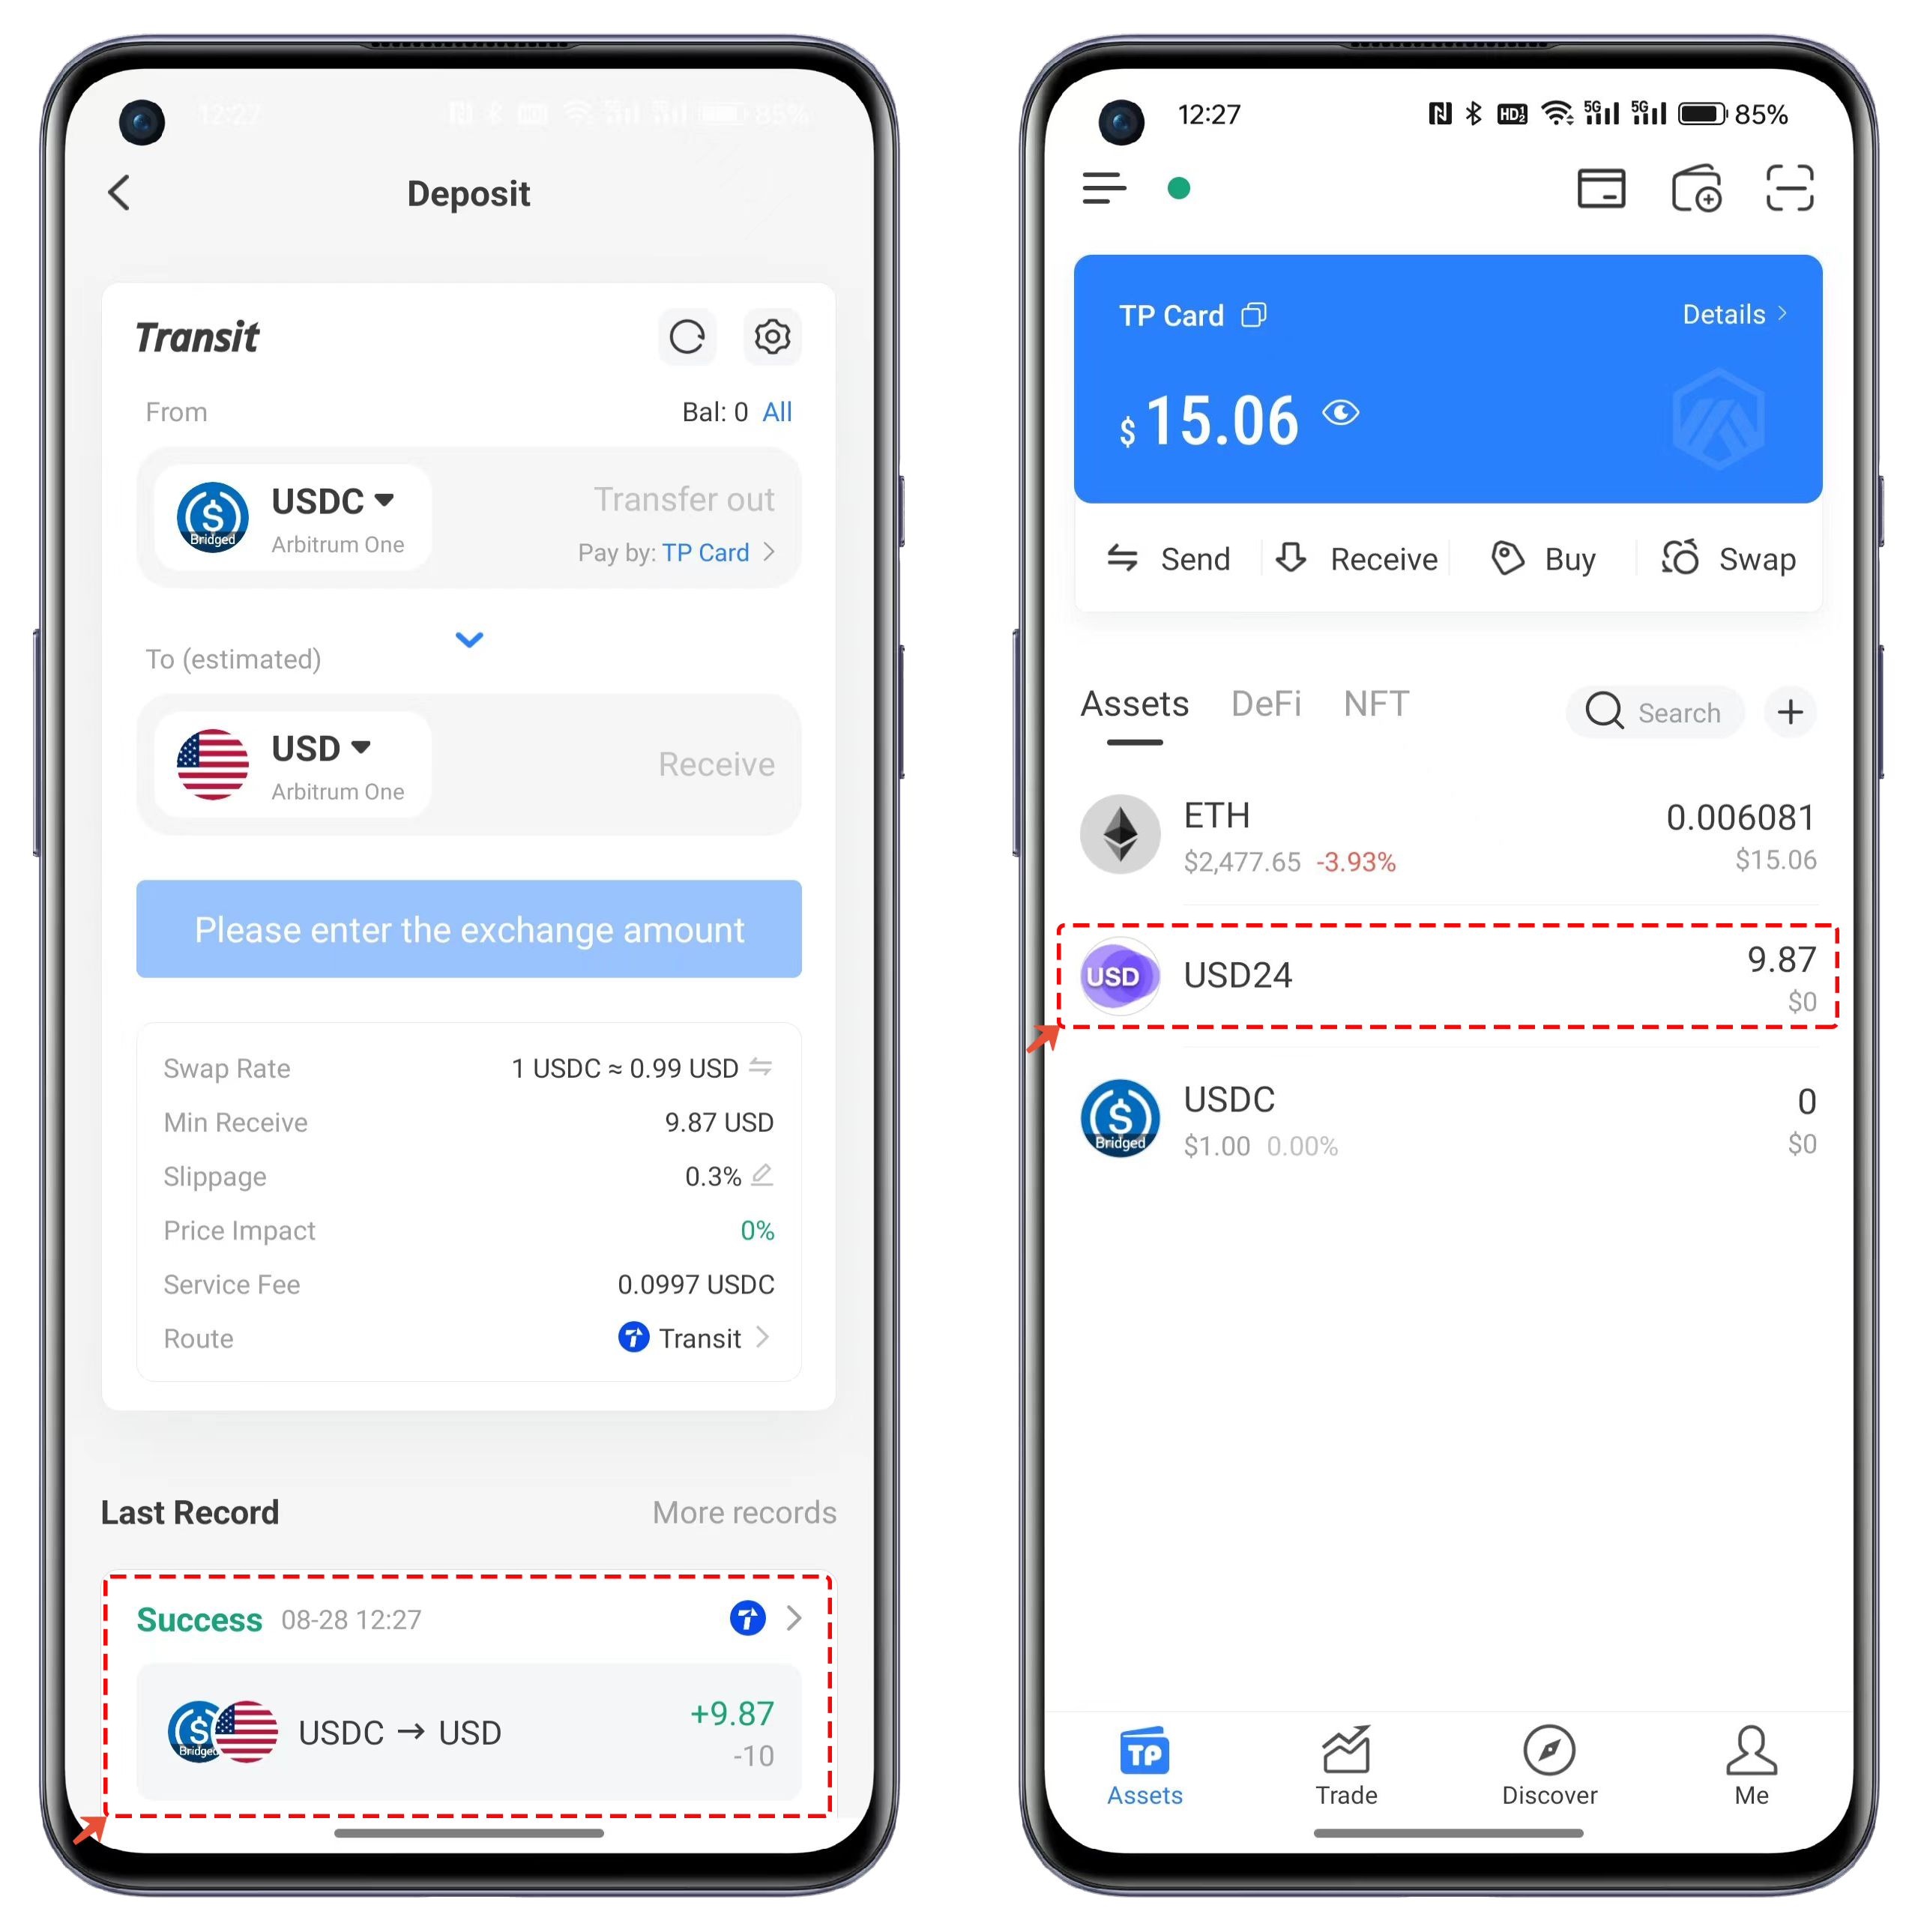
6. After completing the swap, you can see a successful exchange notification in the records at the bottom of the deposit interface. In the asset list, you will see a notification for the USD24 exchange token.
---
# Agent Instructions
This documentation is published with GitBook. GitBook is the documentation platform designed so that both humans and AI agents can read, navigate, and reason over technical content effectively. Learn more at gitbook.com.
## Querying This Documentation
If you need additional information that is not directly available in this page, you can query the documentation dynamically by asking a question.
Perform an HTTP GET request on the current page URL with the `ask` query parameter, and the optional `goal` query parameter:
```
GET https://help.tpwallet.io/en/wallet-operation/tp-card/deposit.md?ask=&goal=
```
`ask` is the immediate question: it should be specific, self-contained, and written in natural language.
`goal` is optional and describes the broader end goal you are ultimately trying to accomplish on behalf of the user. GitBook uses it to tailor the answer towards what is most useful for that goal.
The response will contain a direct answer to the question and relevant excerpts and sources from the documentation.
Use this mechanism when the answer is not explicitly present in the current page, you need clarification or additional context, or you want to retrieve related documentation sections.