> For the complete documentation index, see [llms.txt](https://help.tpwallet.io/cn/llms.txt). Markdown versions of documentation pages are available by appending `.md` to page URLs; this page is available as [Markdown](https://help.tpwallet.io/cn/wallet-operation/tp-card/register_24.md).
# TP Card(Fiat24) Register
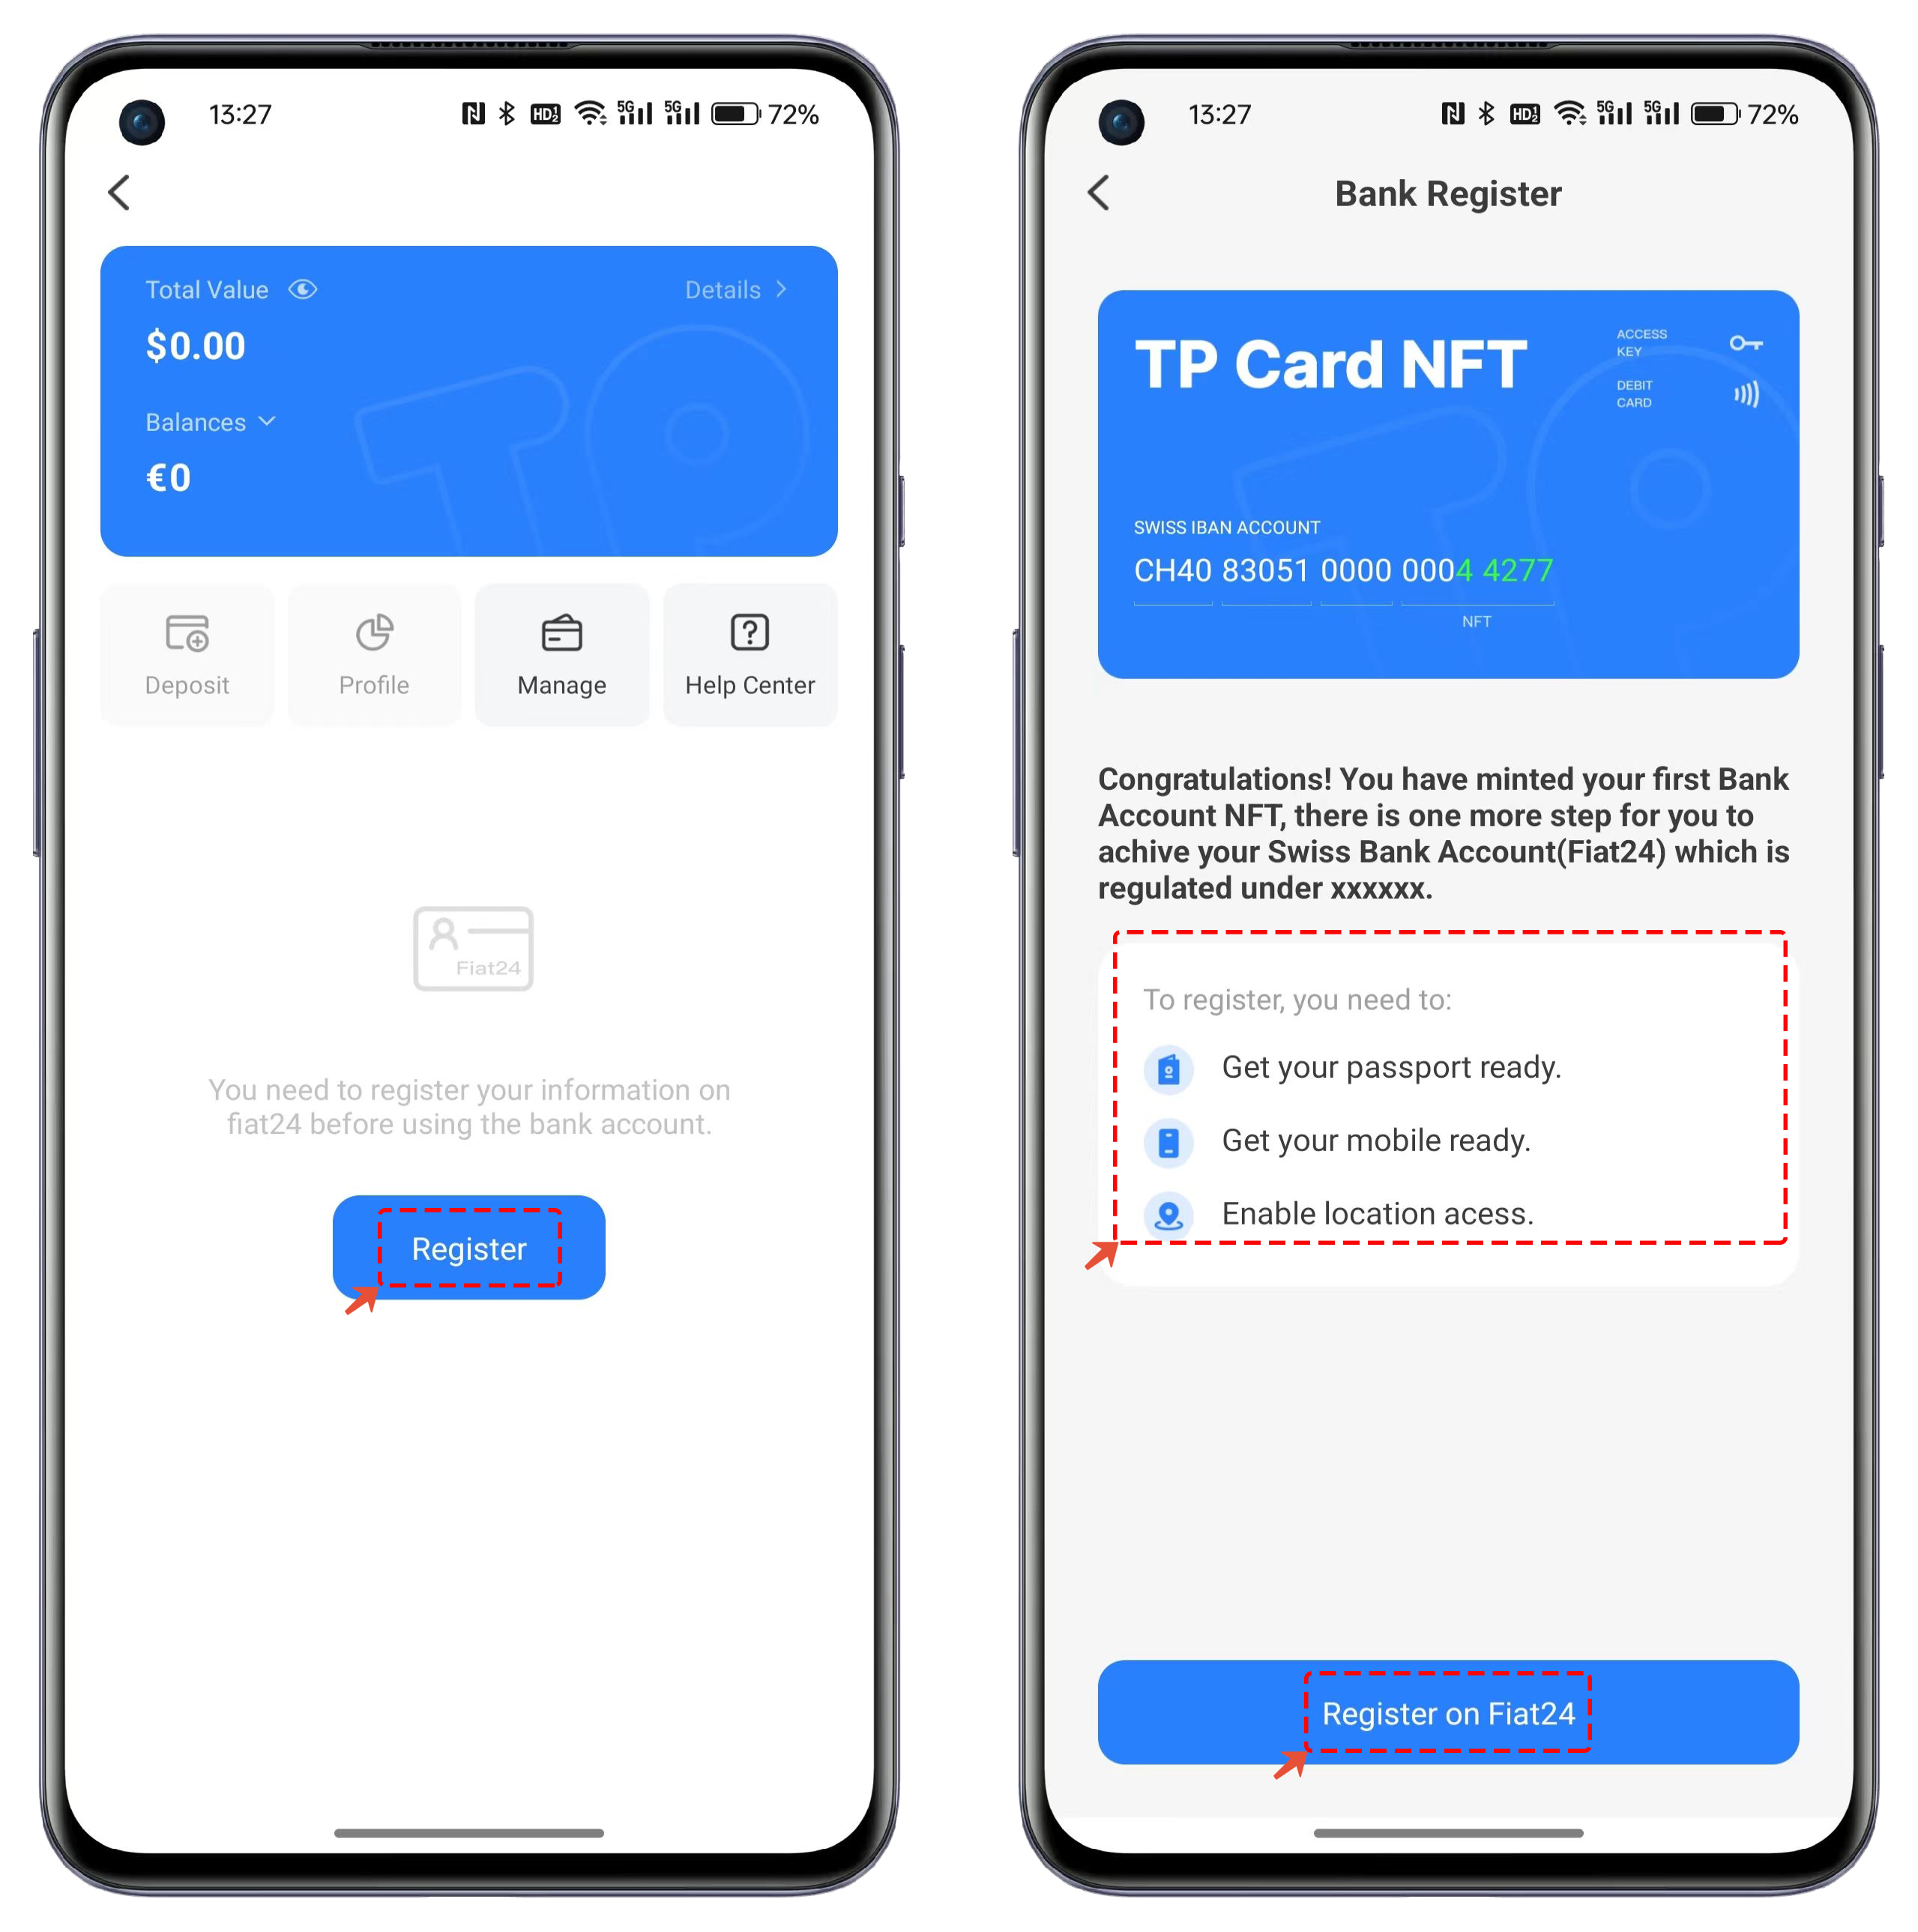
1. Open TP Card and click \[Register]. Please carefully read and prepare the required information under \[Bank Register], then click \[Register on Fiat24].
2. You must select the option to enable GPS, then click 'Start' to begin registration. Fiat24 mainly has three types of usage permissions: Identity, IBAN, and Debit Card. In some regions, the debit card function may not be available. Click the switch next to the country to continue registration.
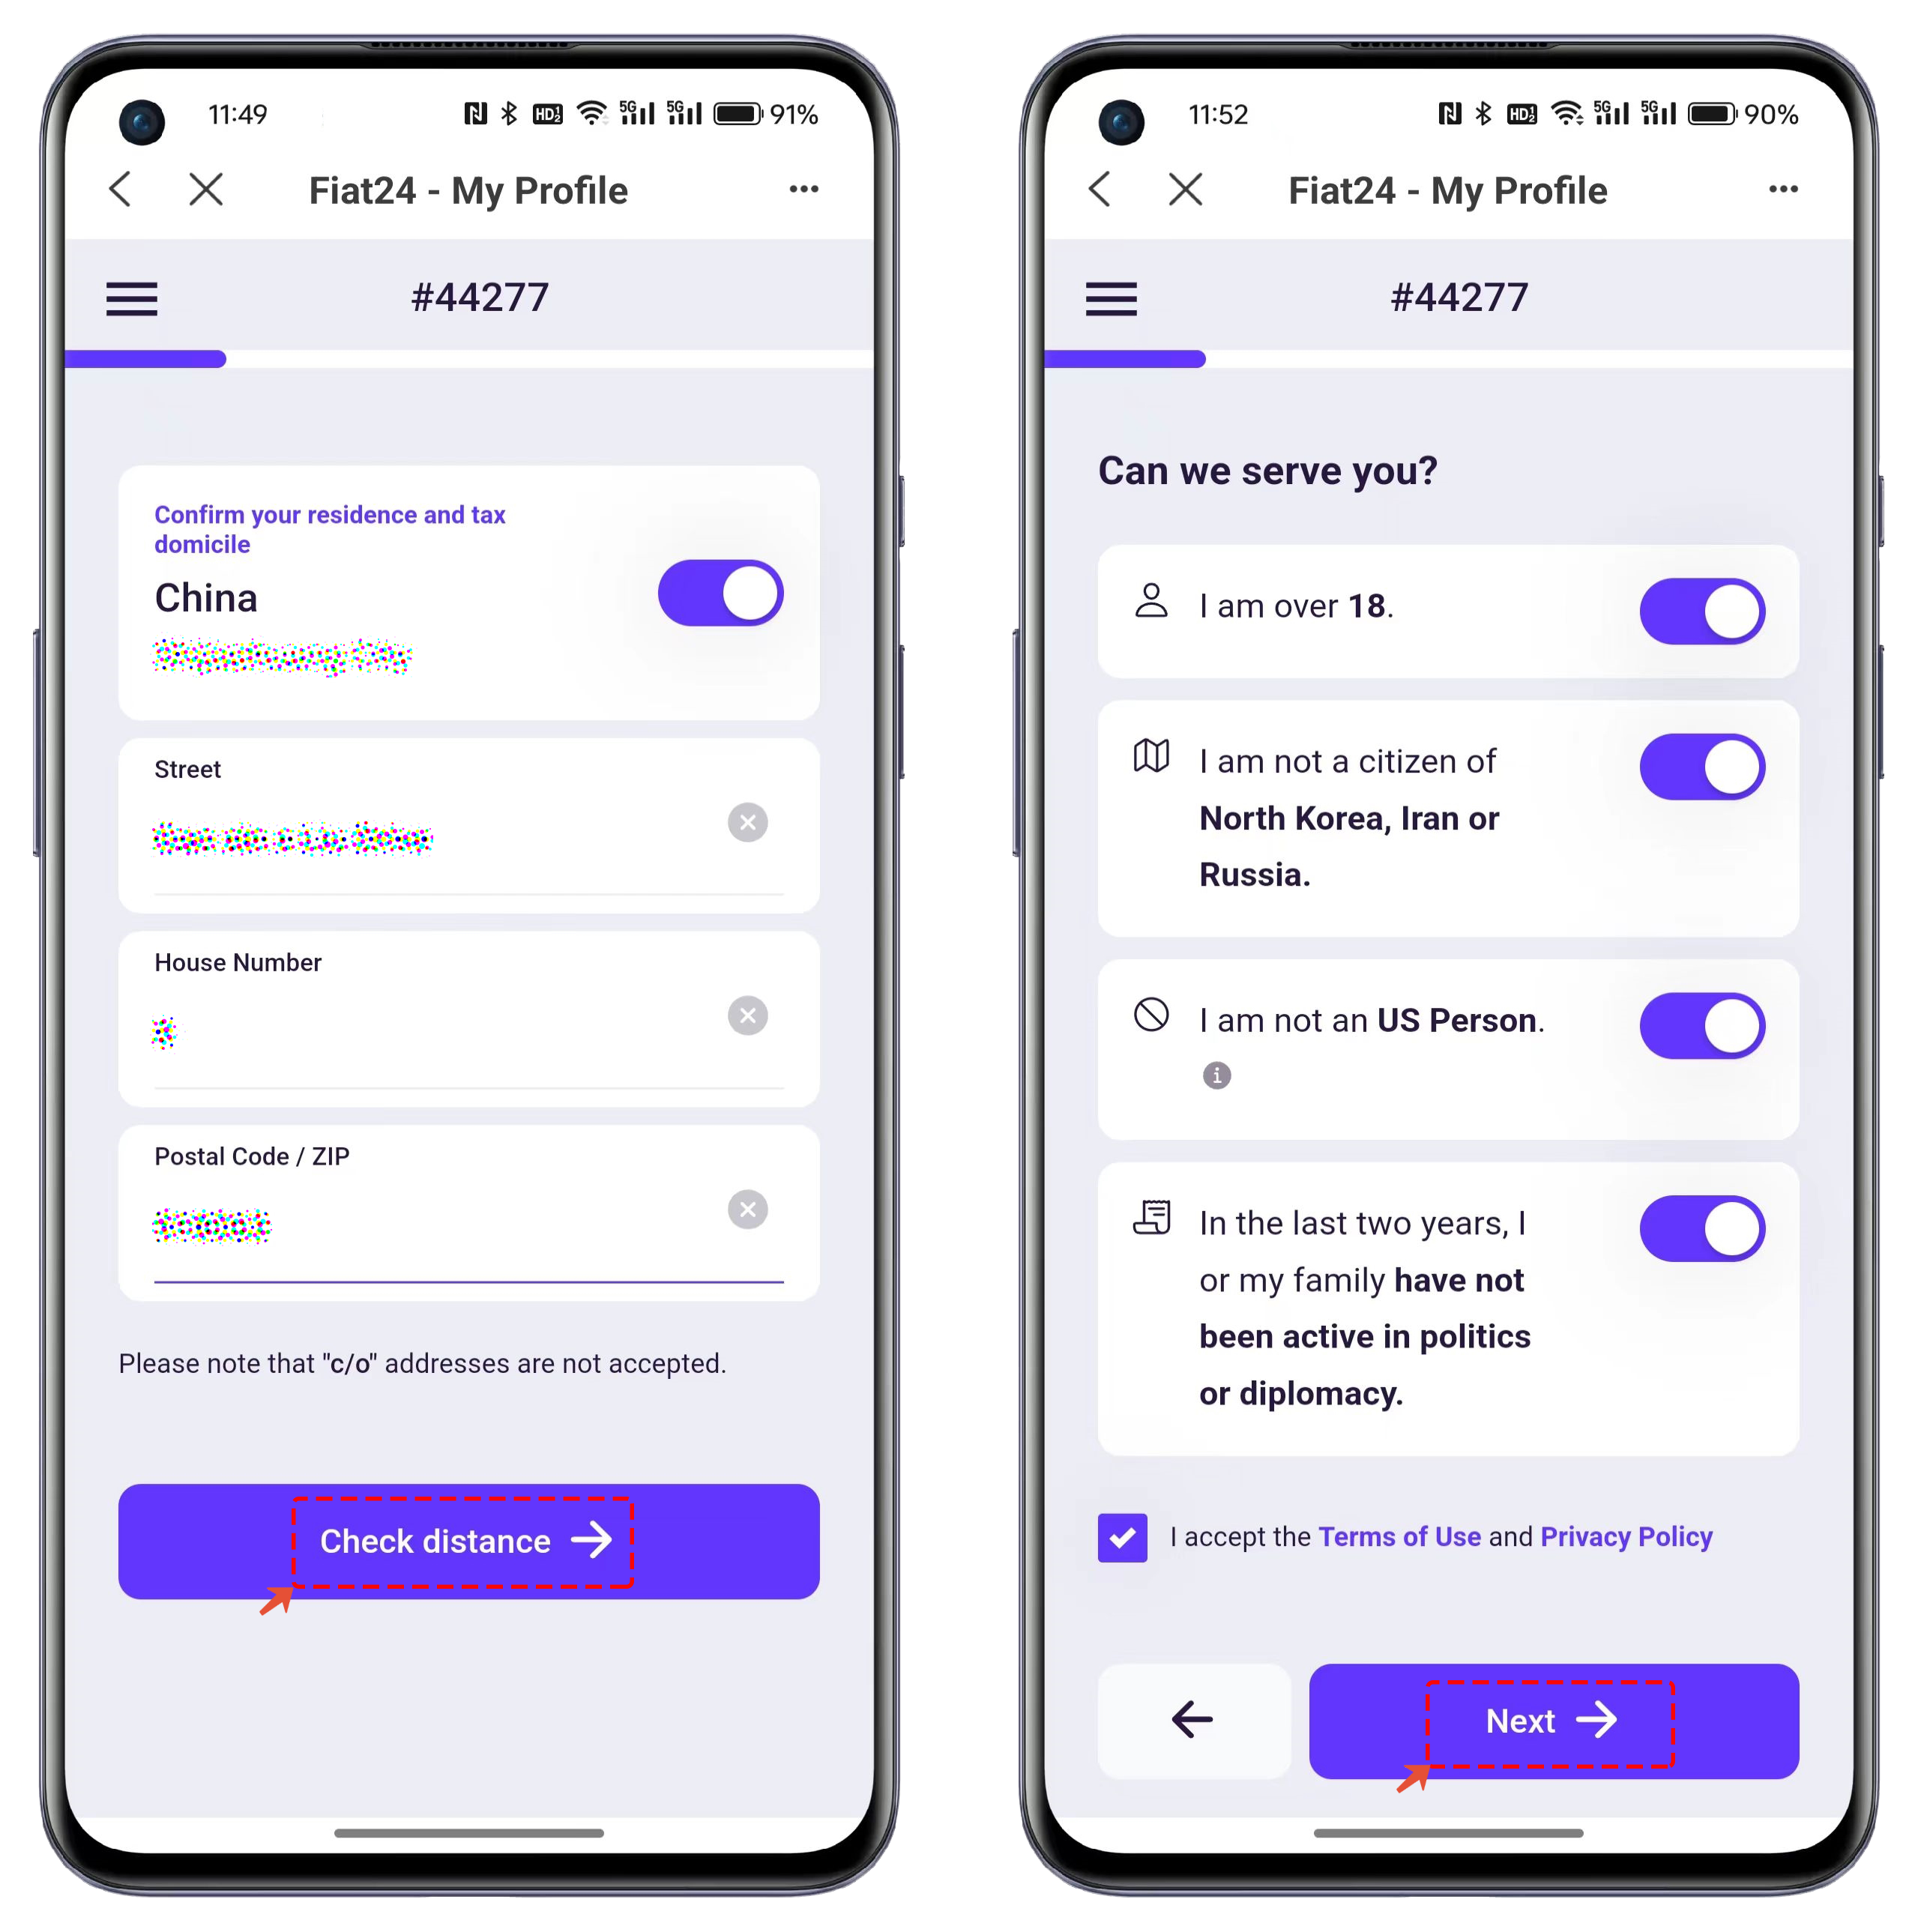
3. Fill in the required information according to the instructions on the screen. Once completed, click \[Check distance] to verify the information. After the check is completed, select the appropriate options based on your actual situation, and then click \[Next] to proceed to the next registration step.
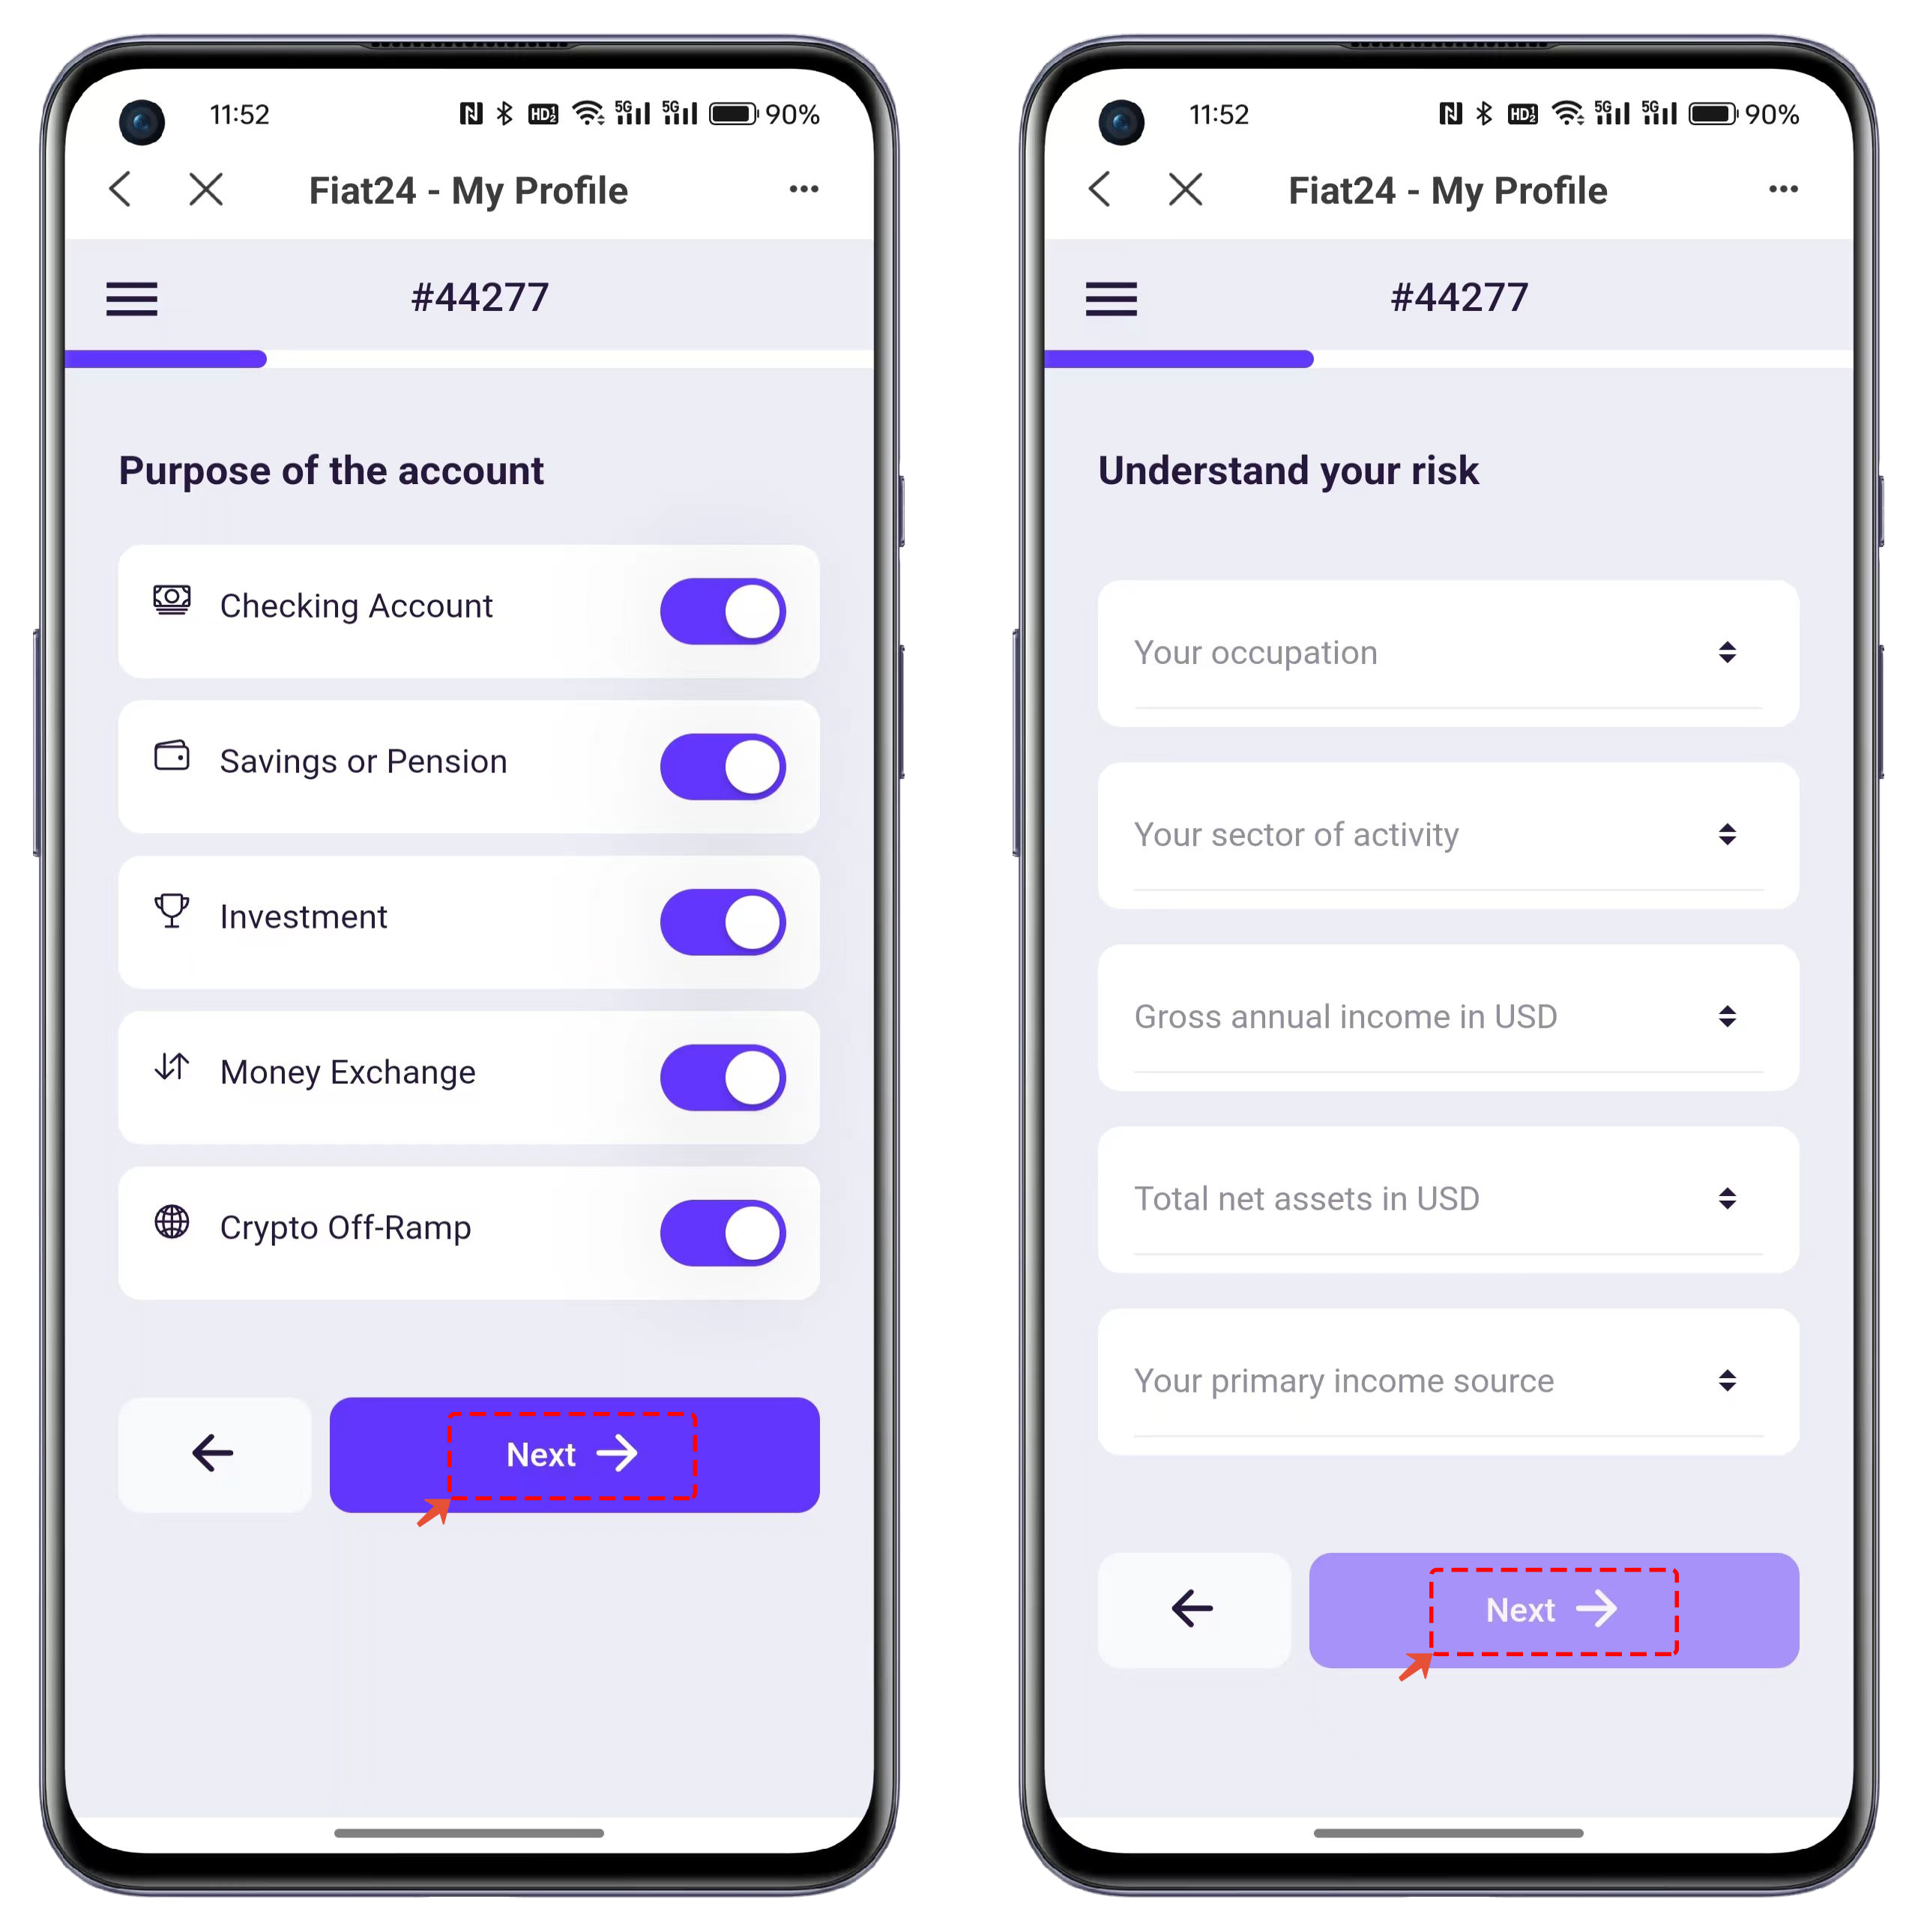
4. Select or check the purpose of card use and acknowledge the related usage risks. Finally, click \[Next] to proceed to the next step.
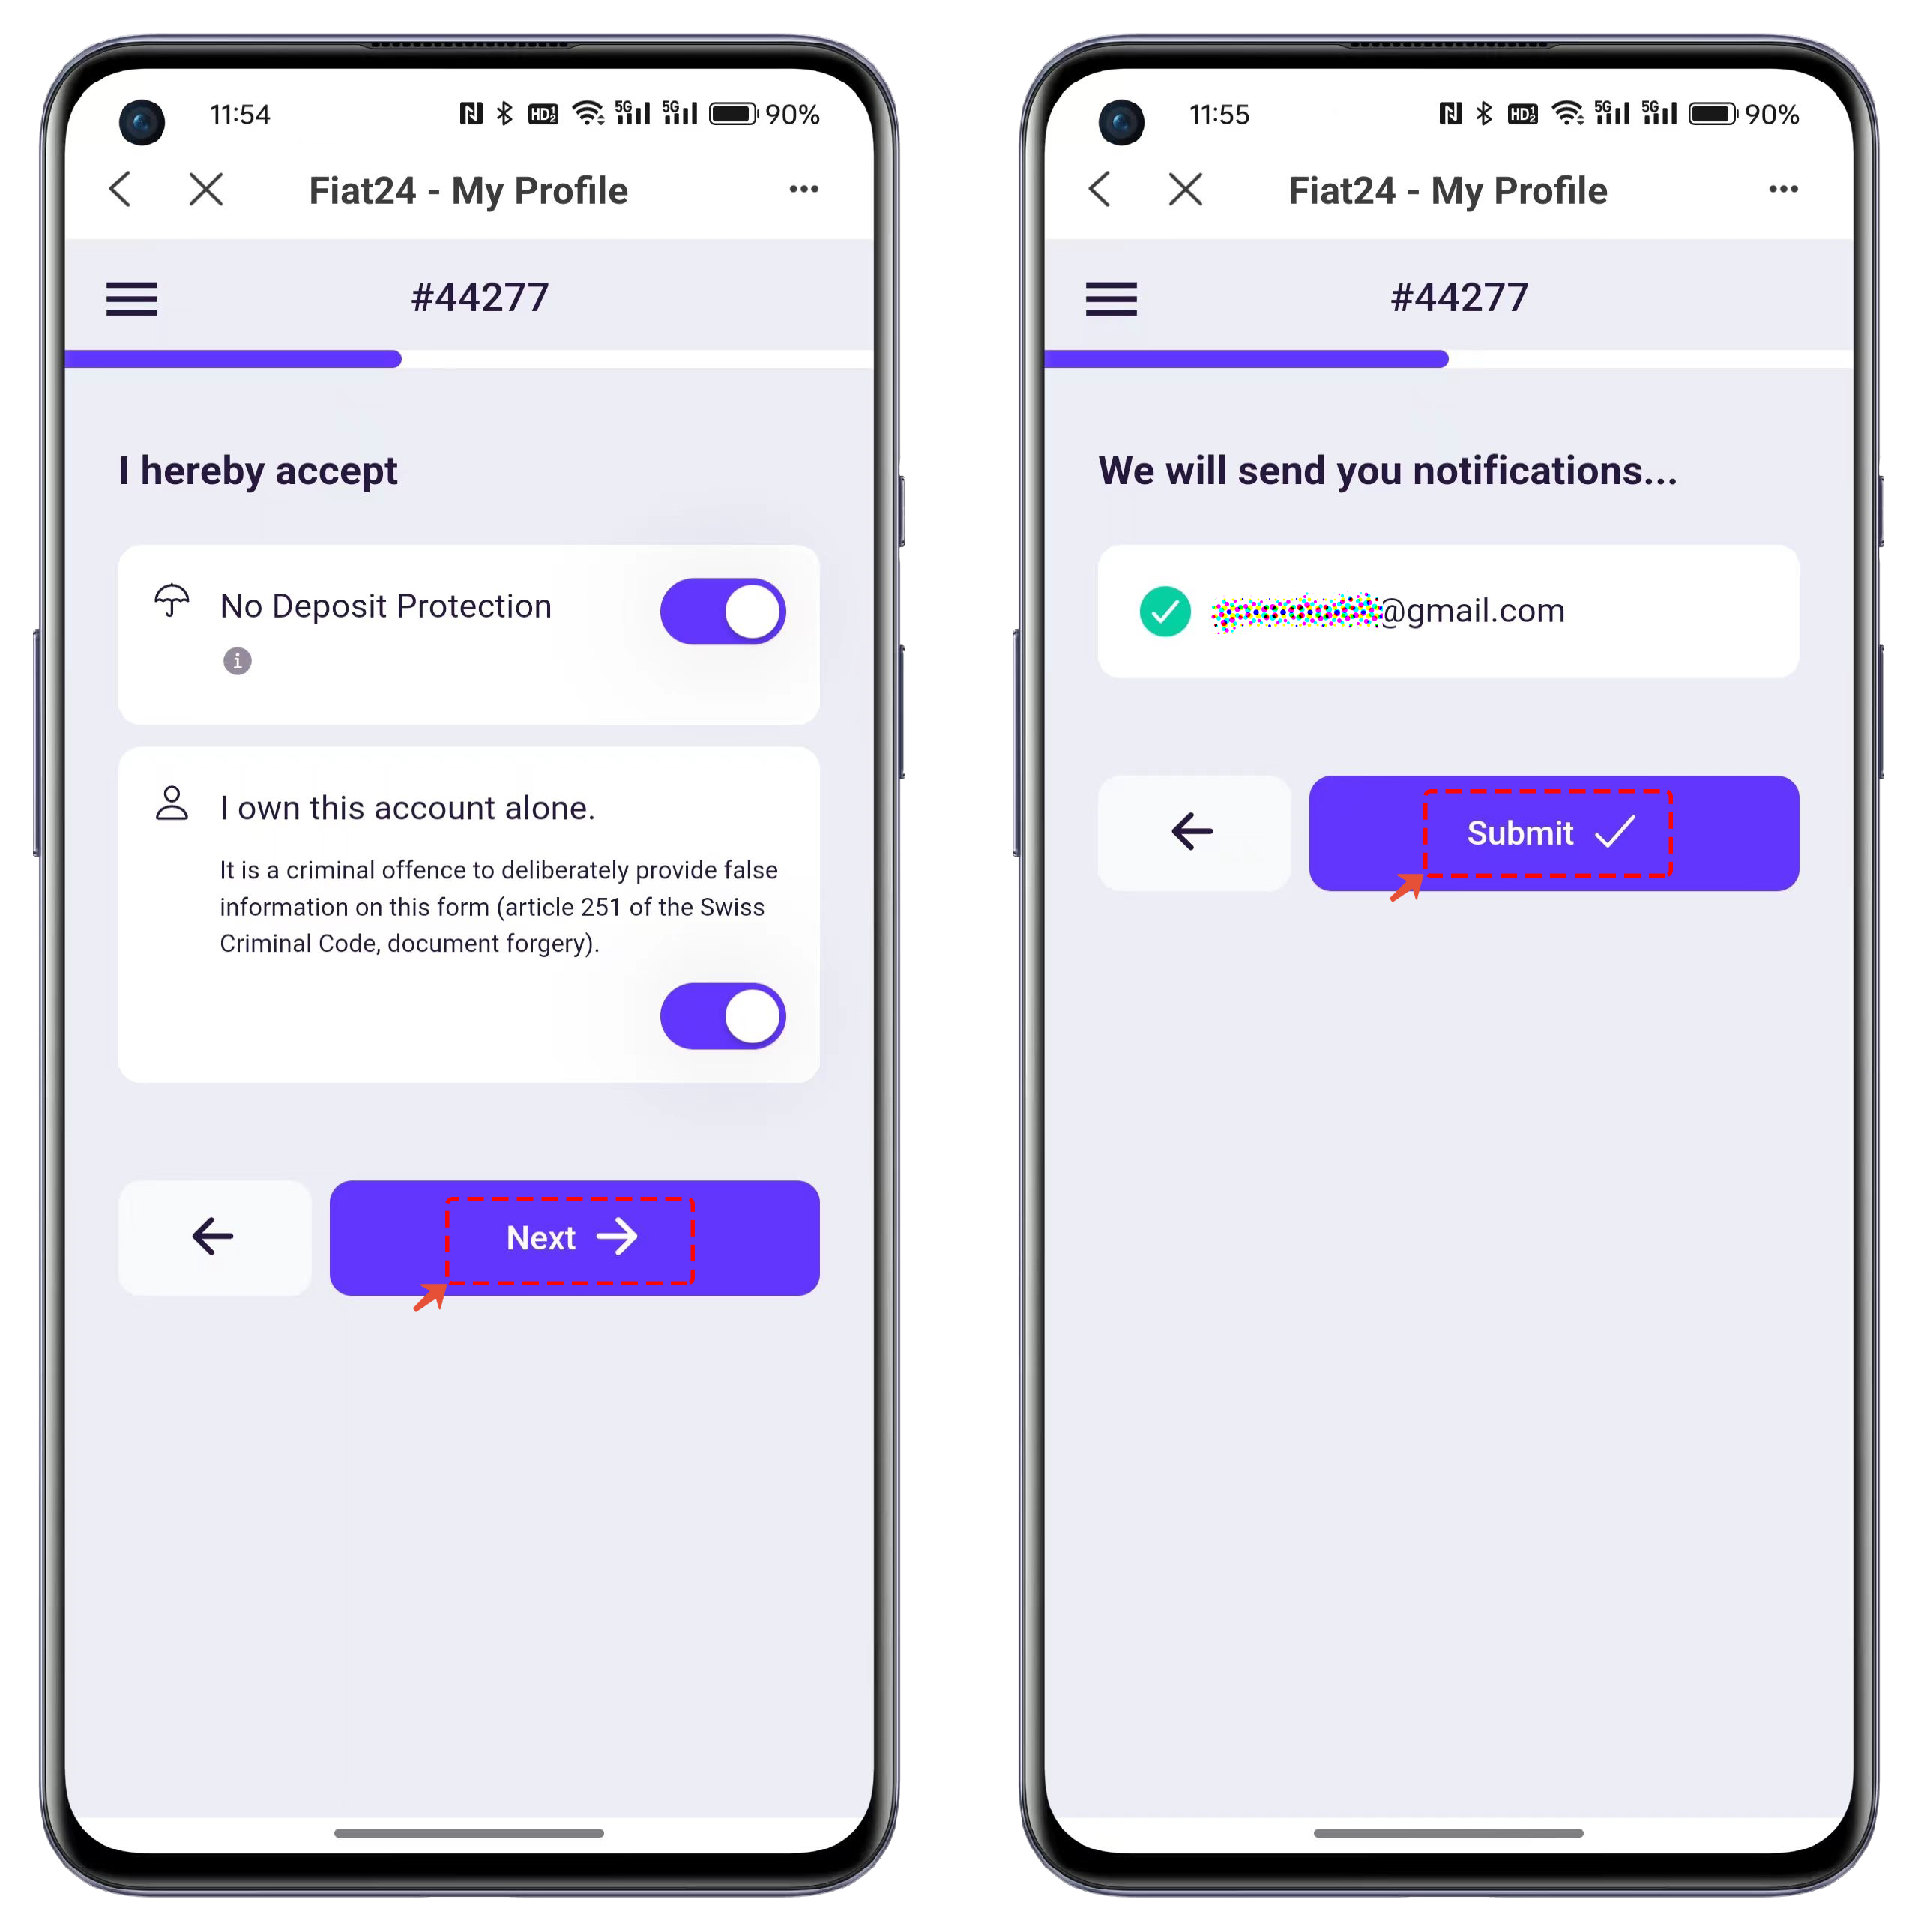
5. On the screen, you need to check two options. A signature window will pop up during the process. After completing the signature, you will need to verify your email address. Once done, click \[Submit].
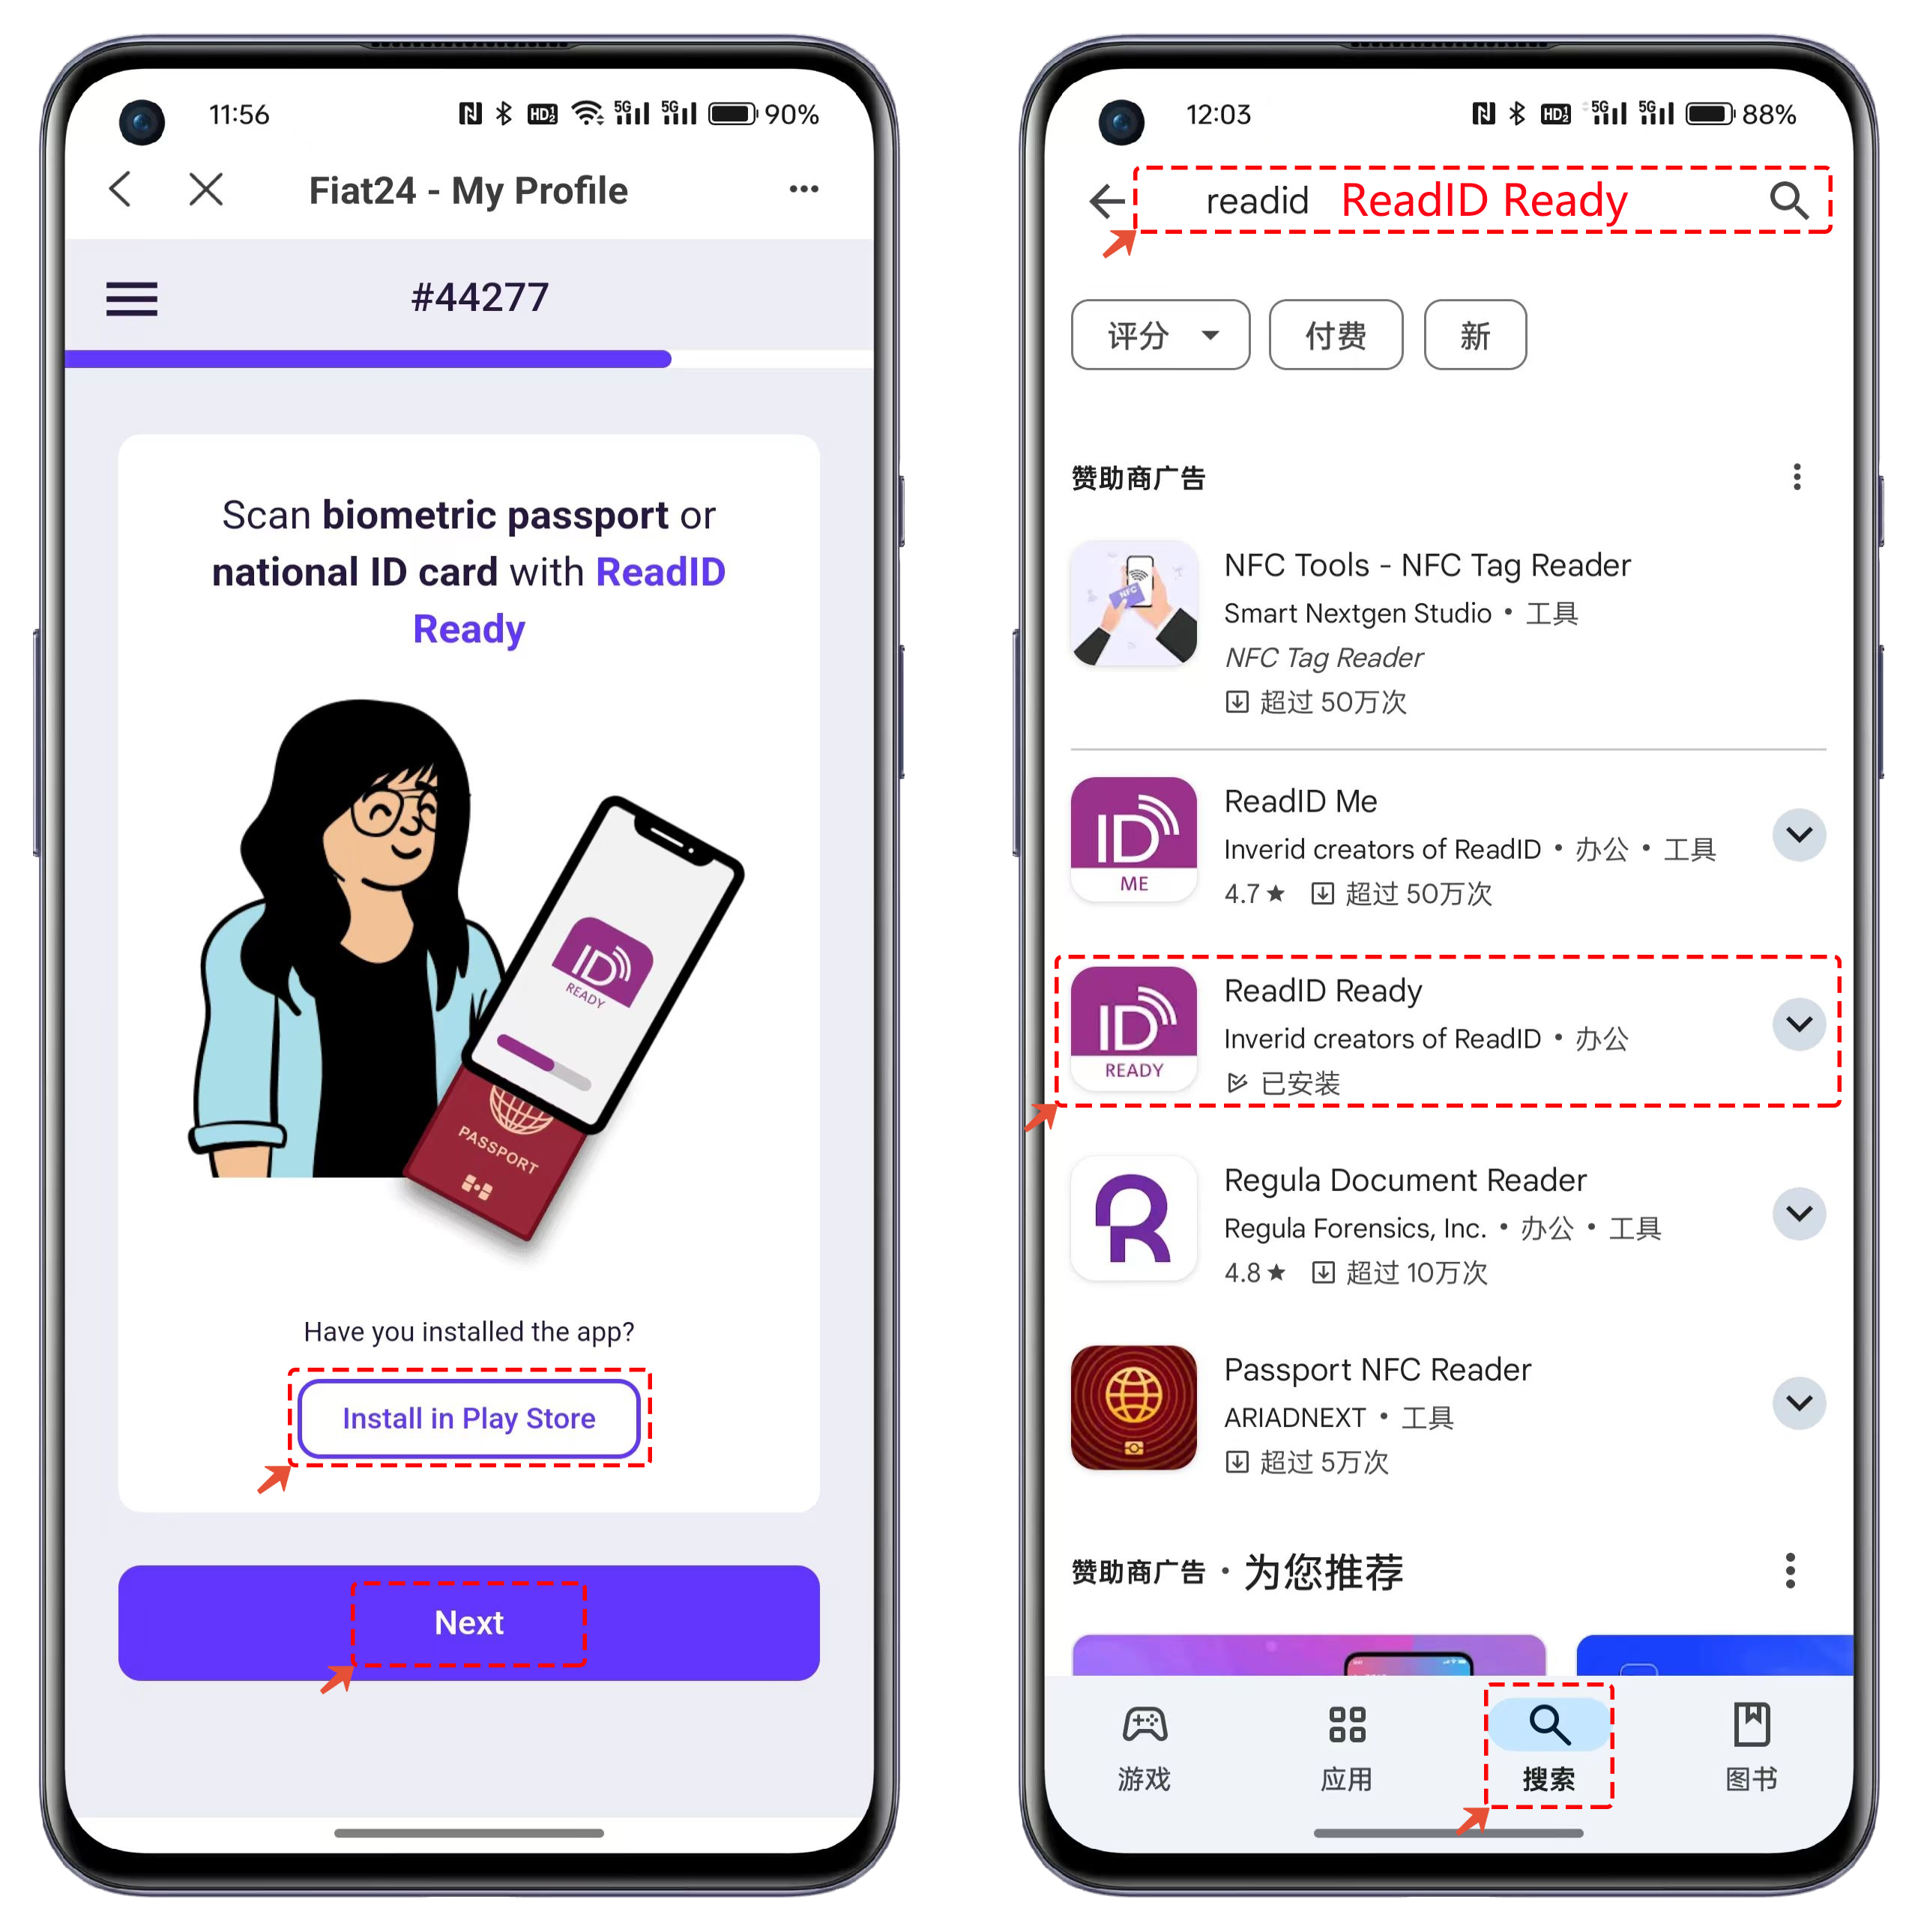
6. Next, you will reach the screen for scanning a biometric passport to read your ID or identification card information. You can click \[Install In Play Store] on the screen to download the ReadID Ready app. If the download does not start after clicking, you can manually download it via Google Play or the App Store (for iOS users). Then, click \[Next].
After downloading, you can use ReadID Ready to link it with your passport. For a detailed tutorial, you can refer to: .
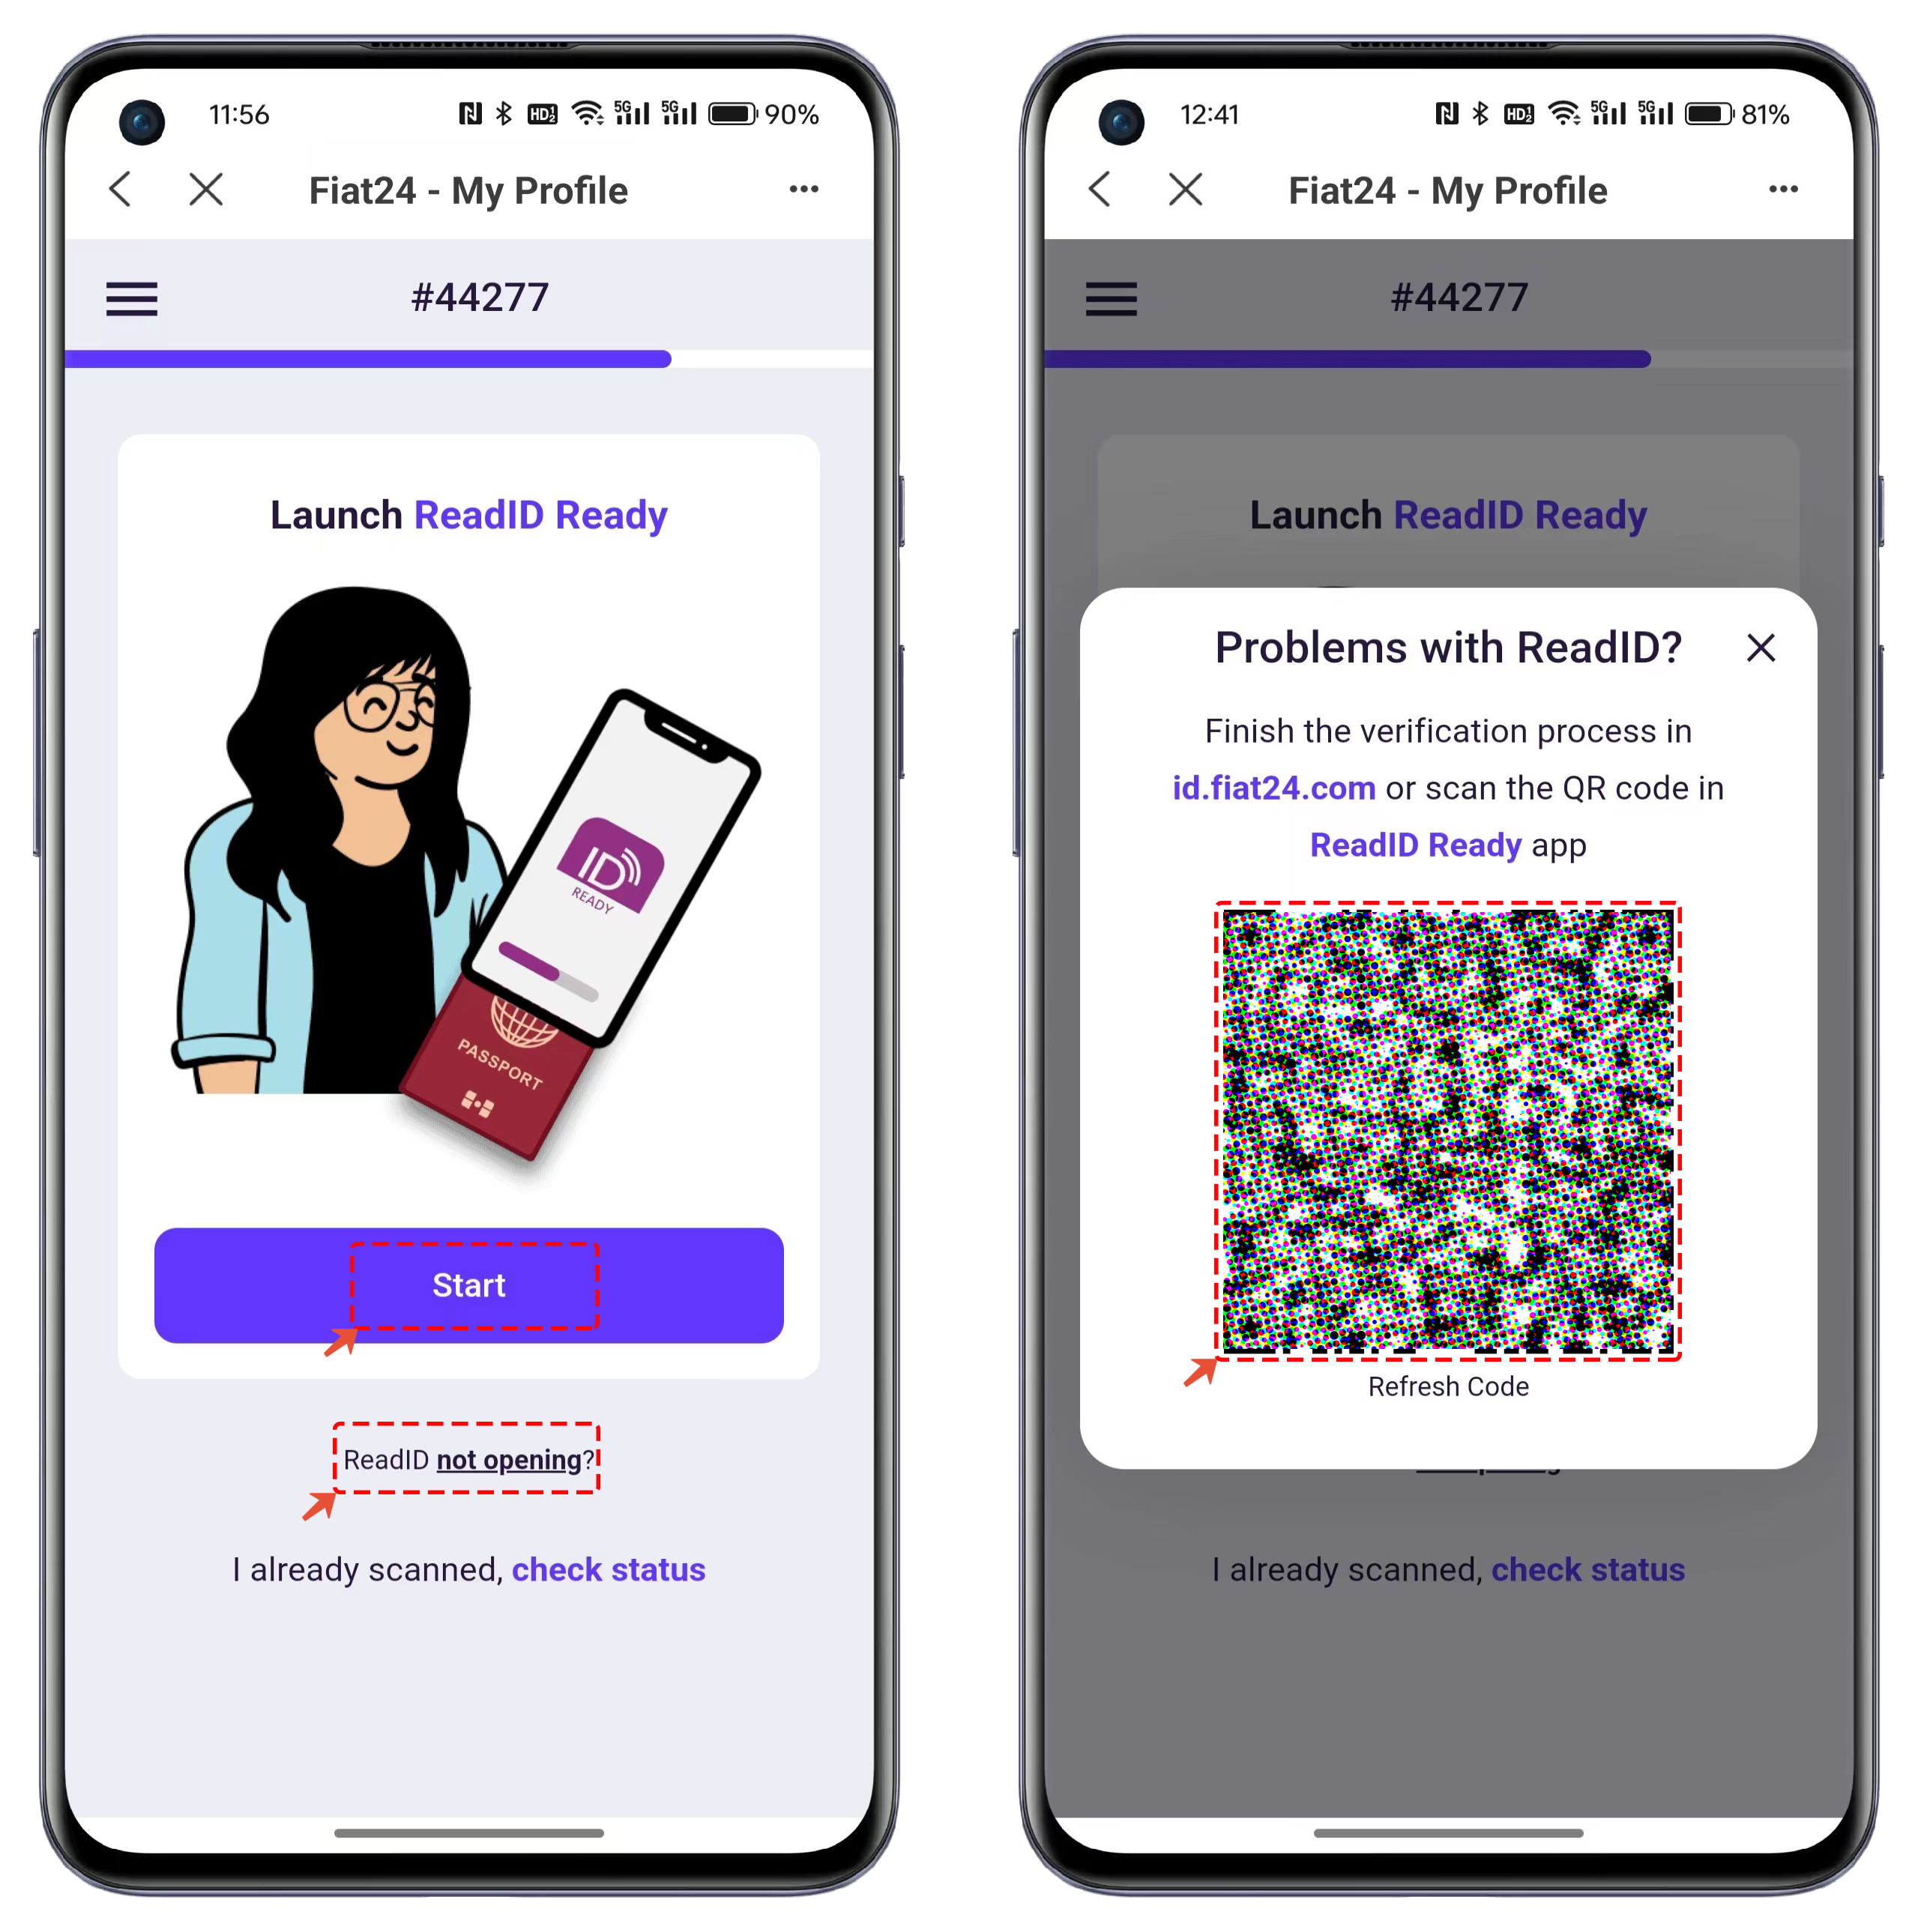
7. On the 'Launch ReadID Ready' screen, simply click 'Start' to open the ReadID Ready app for data verification. If clicking does not open ReadID Ready, you can click \[ReadID not opening] below, which will display a QR code screen.
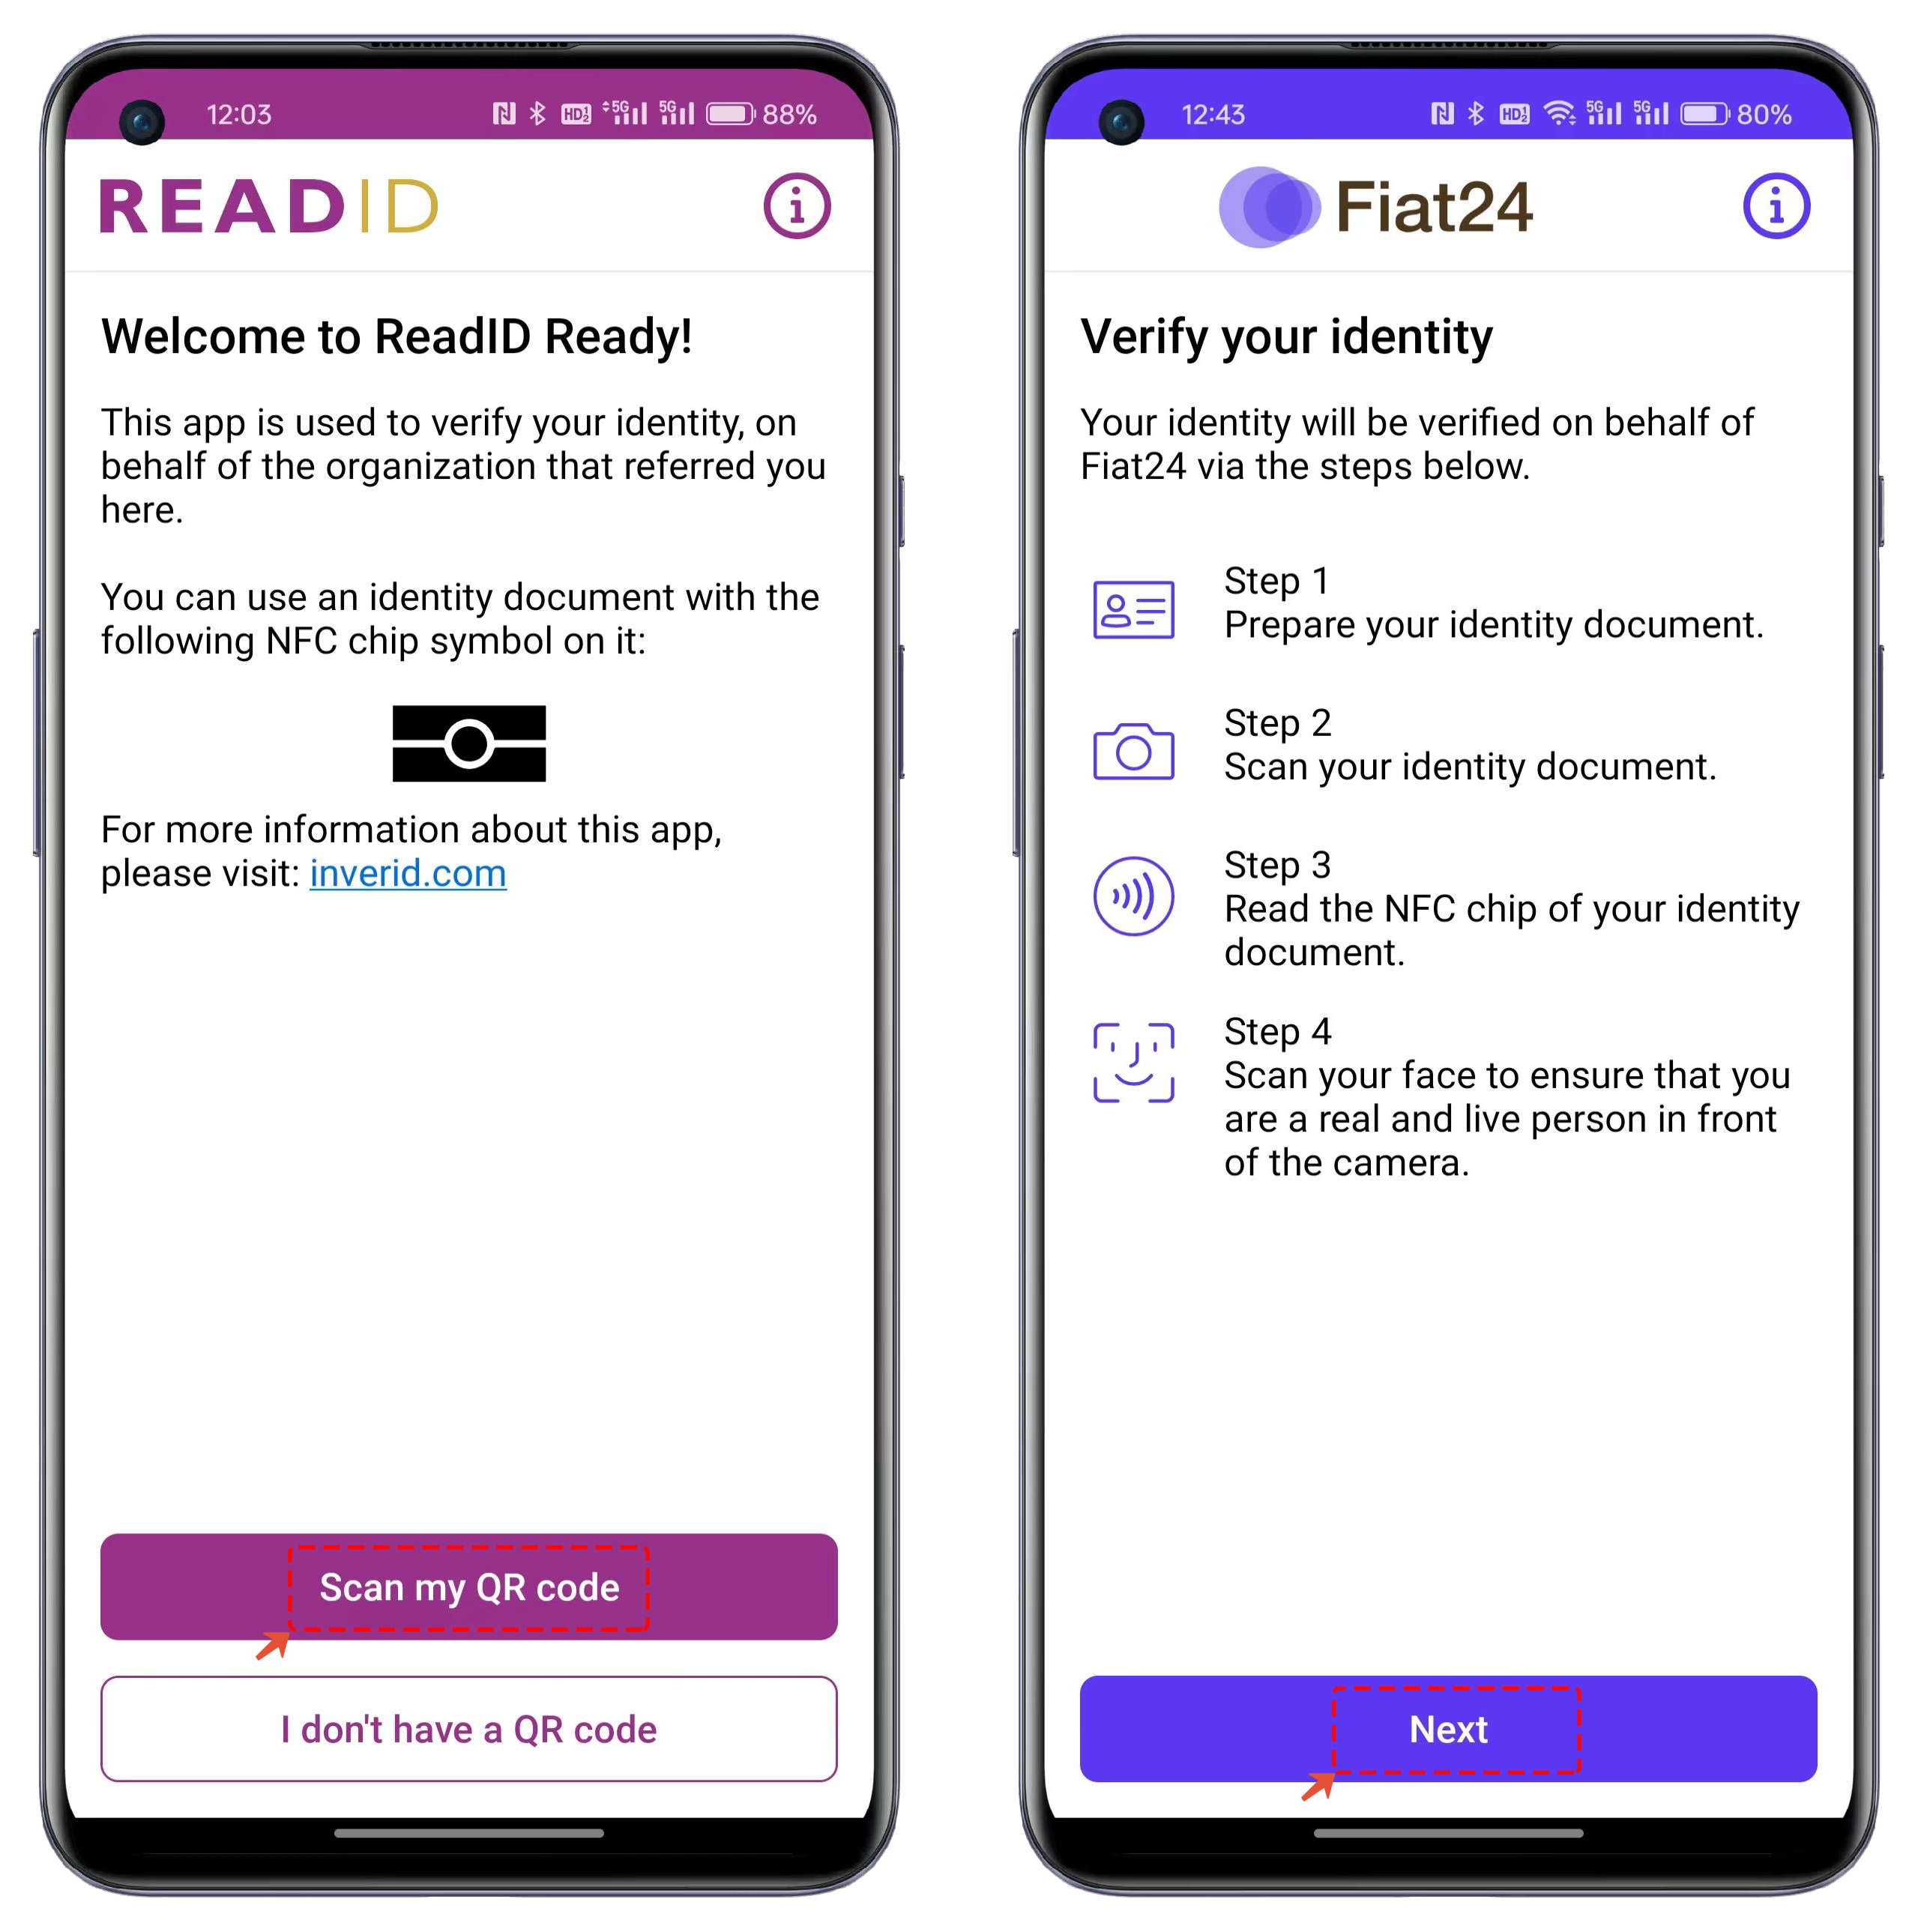
8. Open ReadID Ready and click \[Scan my QR code] to scan the displayed QR code. This will automatically redirect you to the Fiat24 identity verification page. Follow the on-screen instructions to proceed.
After completing the final verification, you will see a message indicating successful submission on the screen. Next, simply wait patiently for the approval. Once approved, you will have access to all the features of the TP Card.