> For the complete documentation index, see [llms.txt](https://help.tpwallet.io/cn/llms.txt). Markdown versions of documentation pages are available by appending `.md` to page URLs; this page is available as [Markdown](https://help.tpwallet.io/cn/wallet-operation/tp-card/register.md).
# TP Card Create/Import
### **TP Card Creation Tutorial**
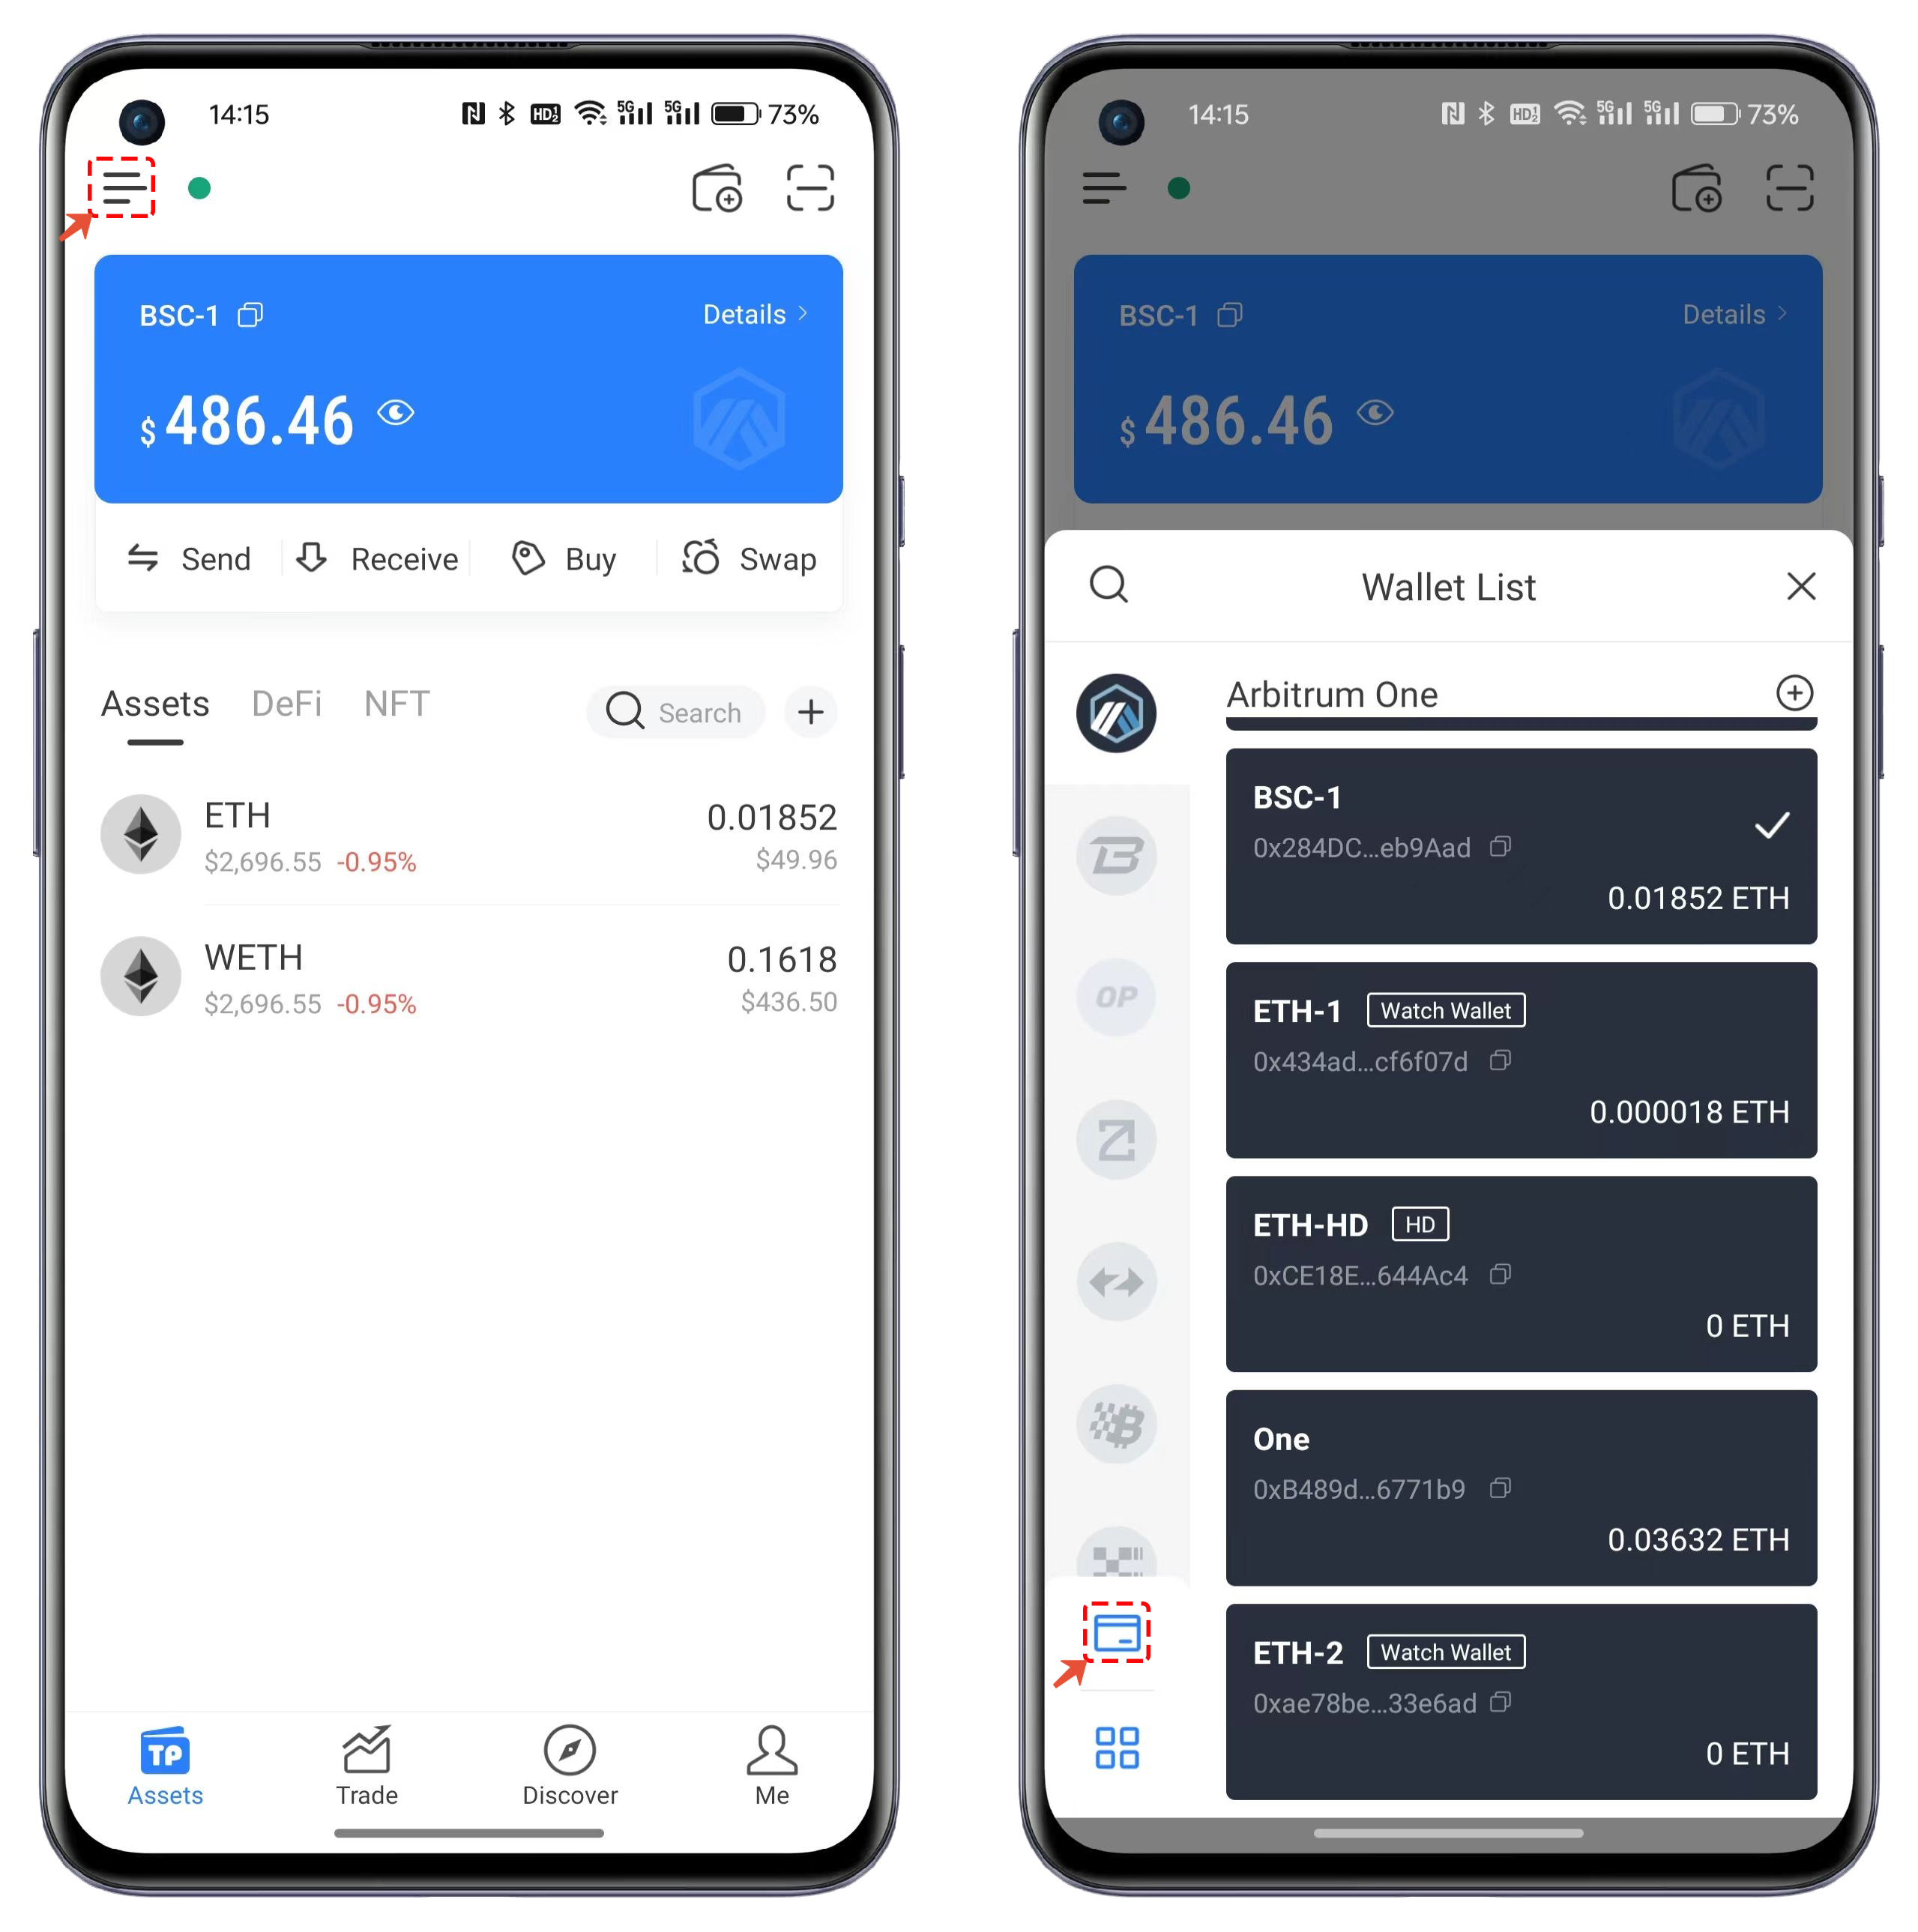
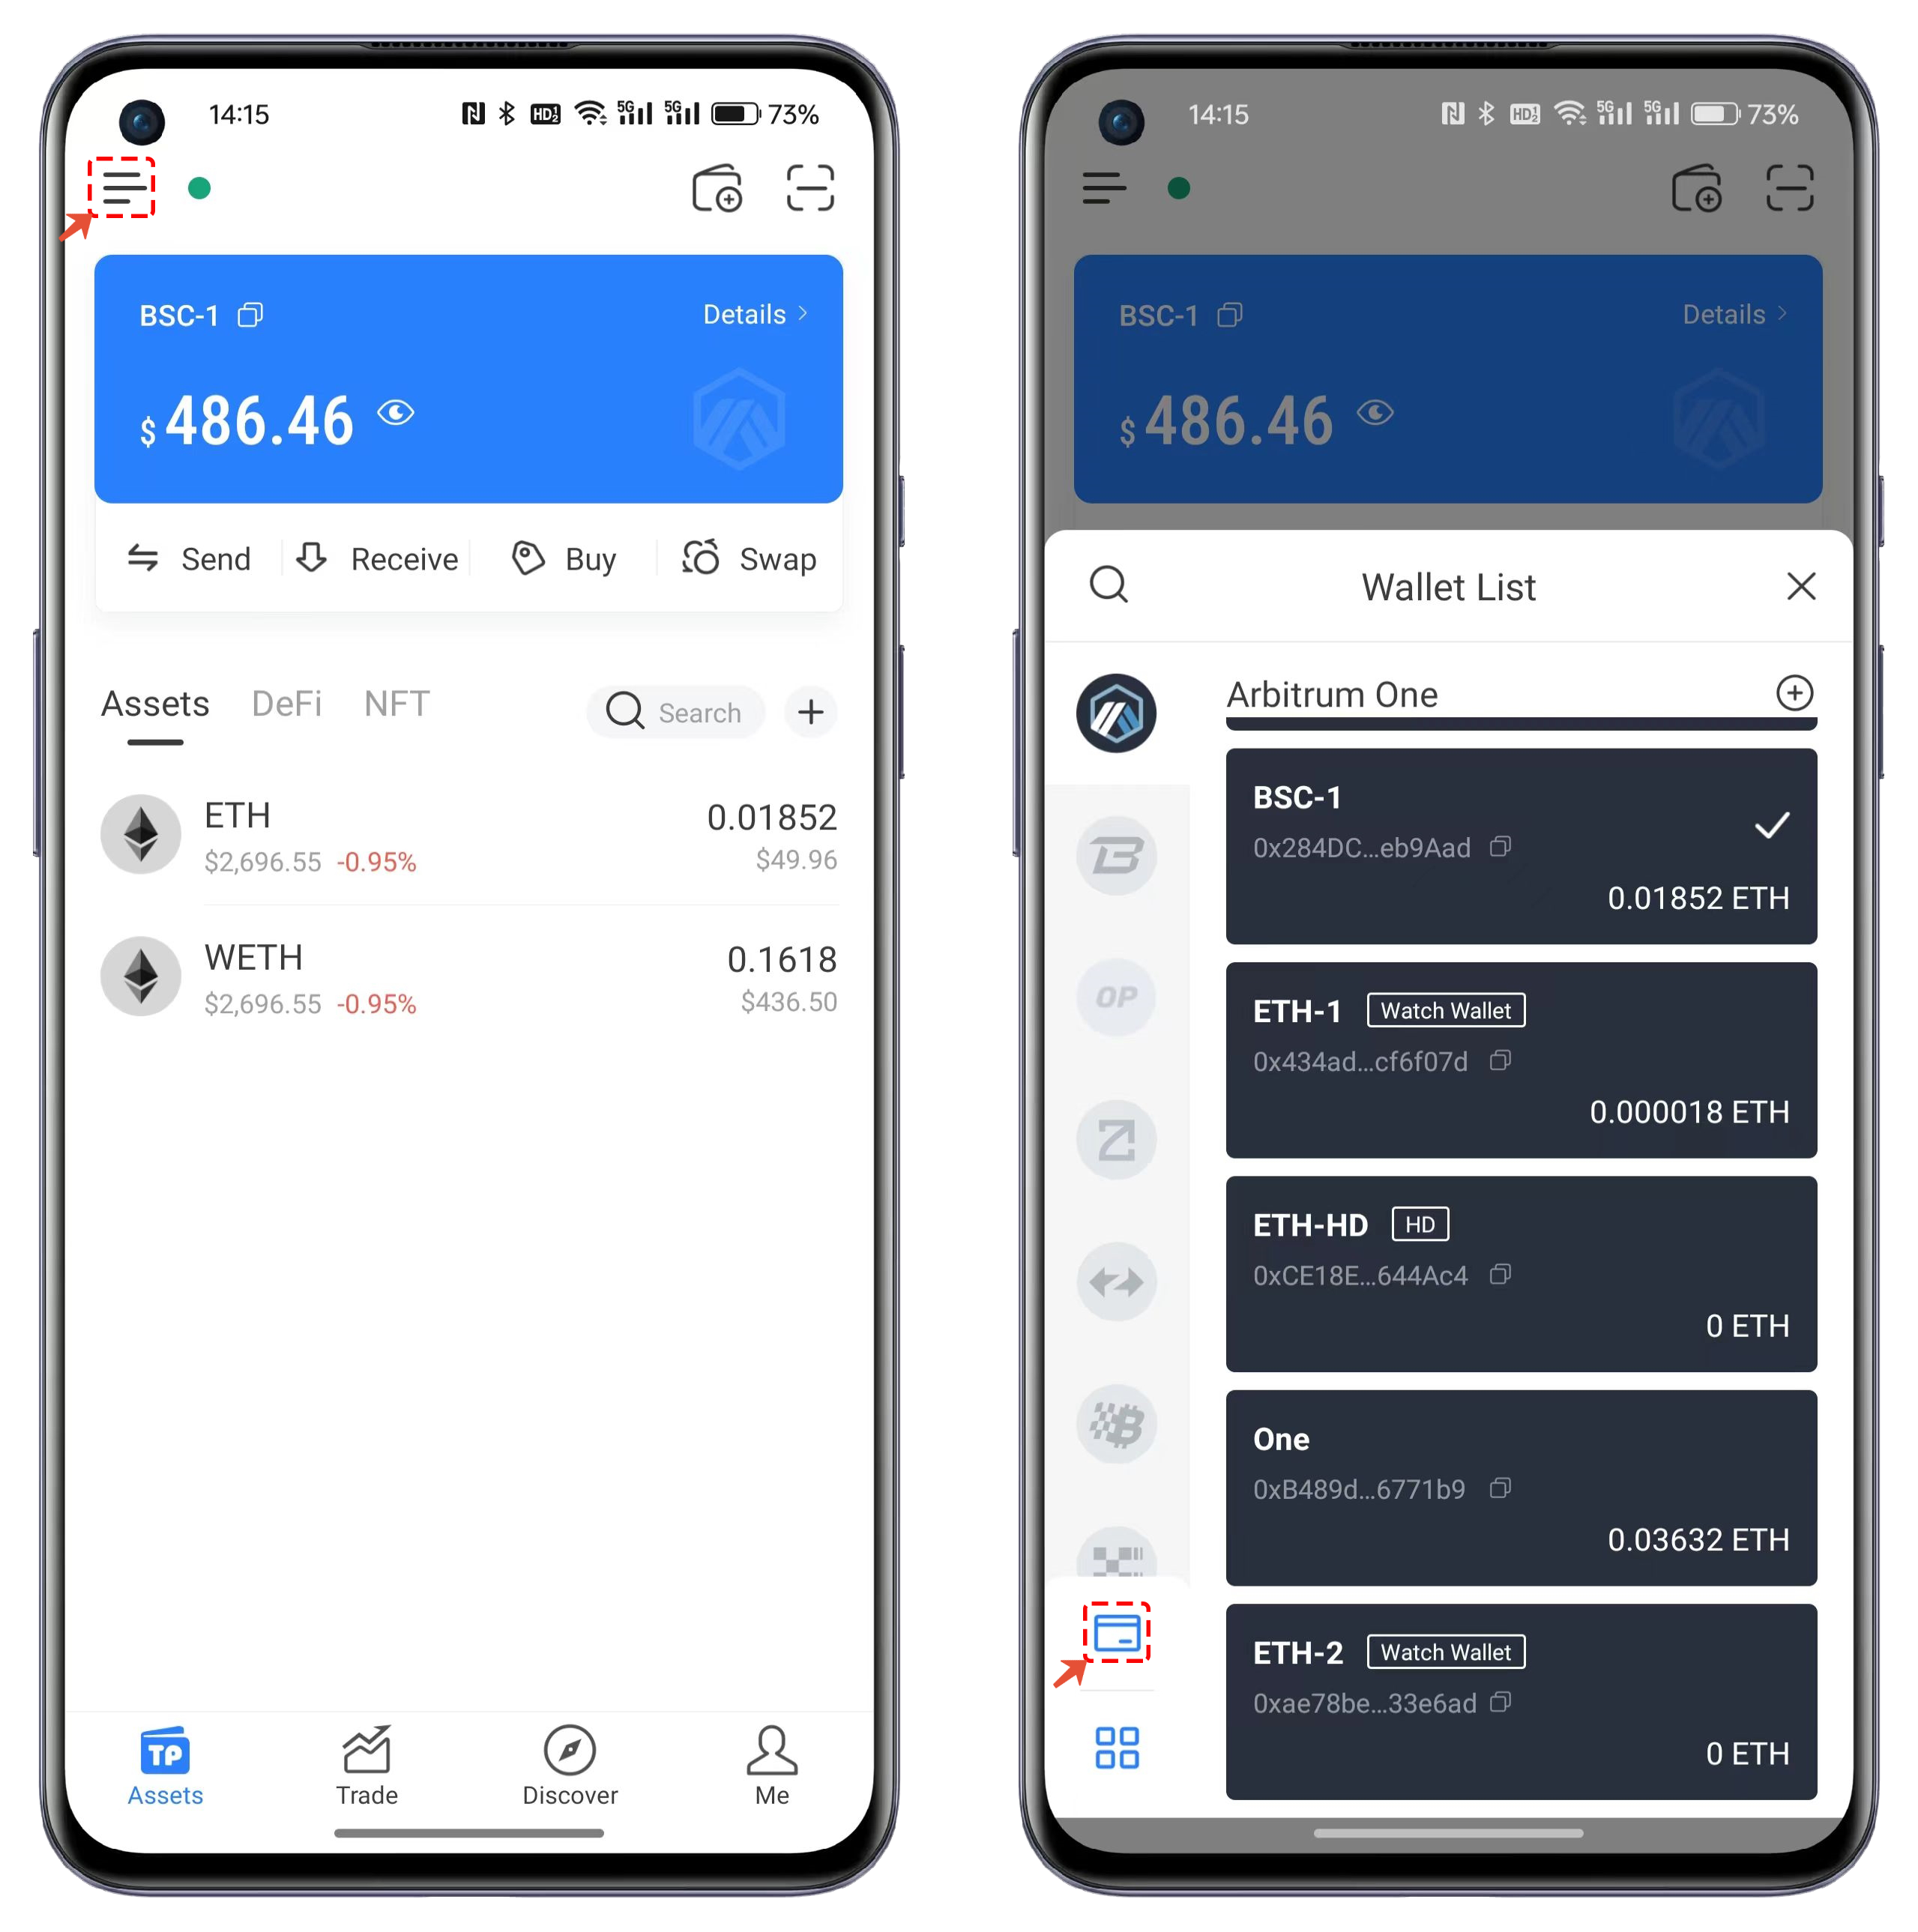
1. Open TokenPocket, click on the menu in the top left corner, and access the operation interface through the TP Card entry at the bottom left.
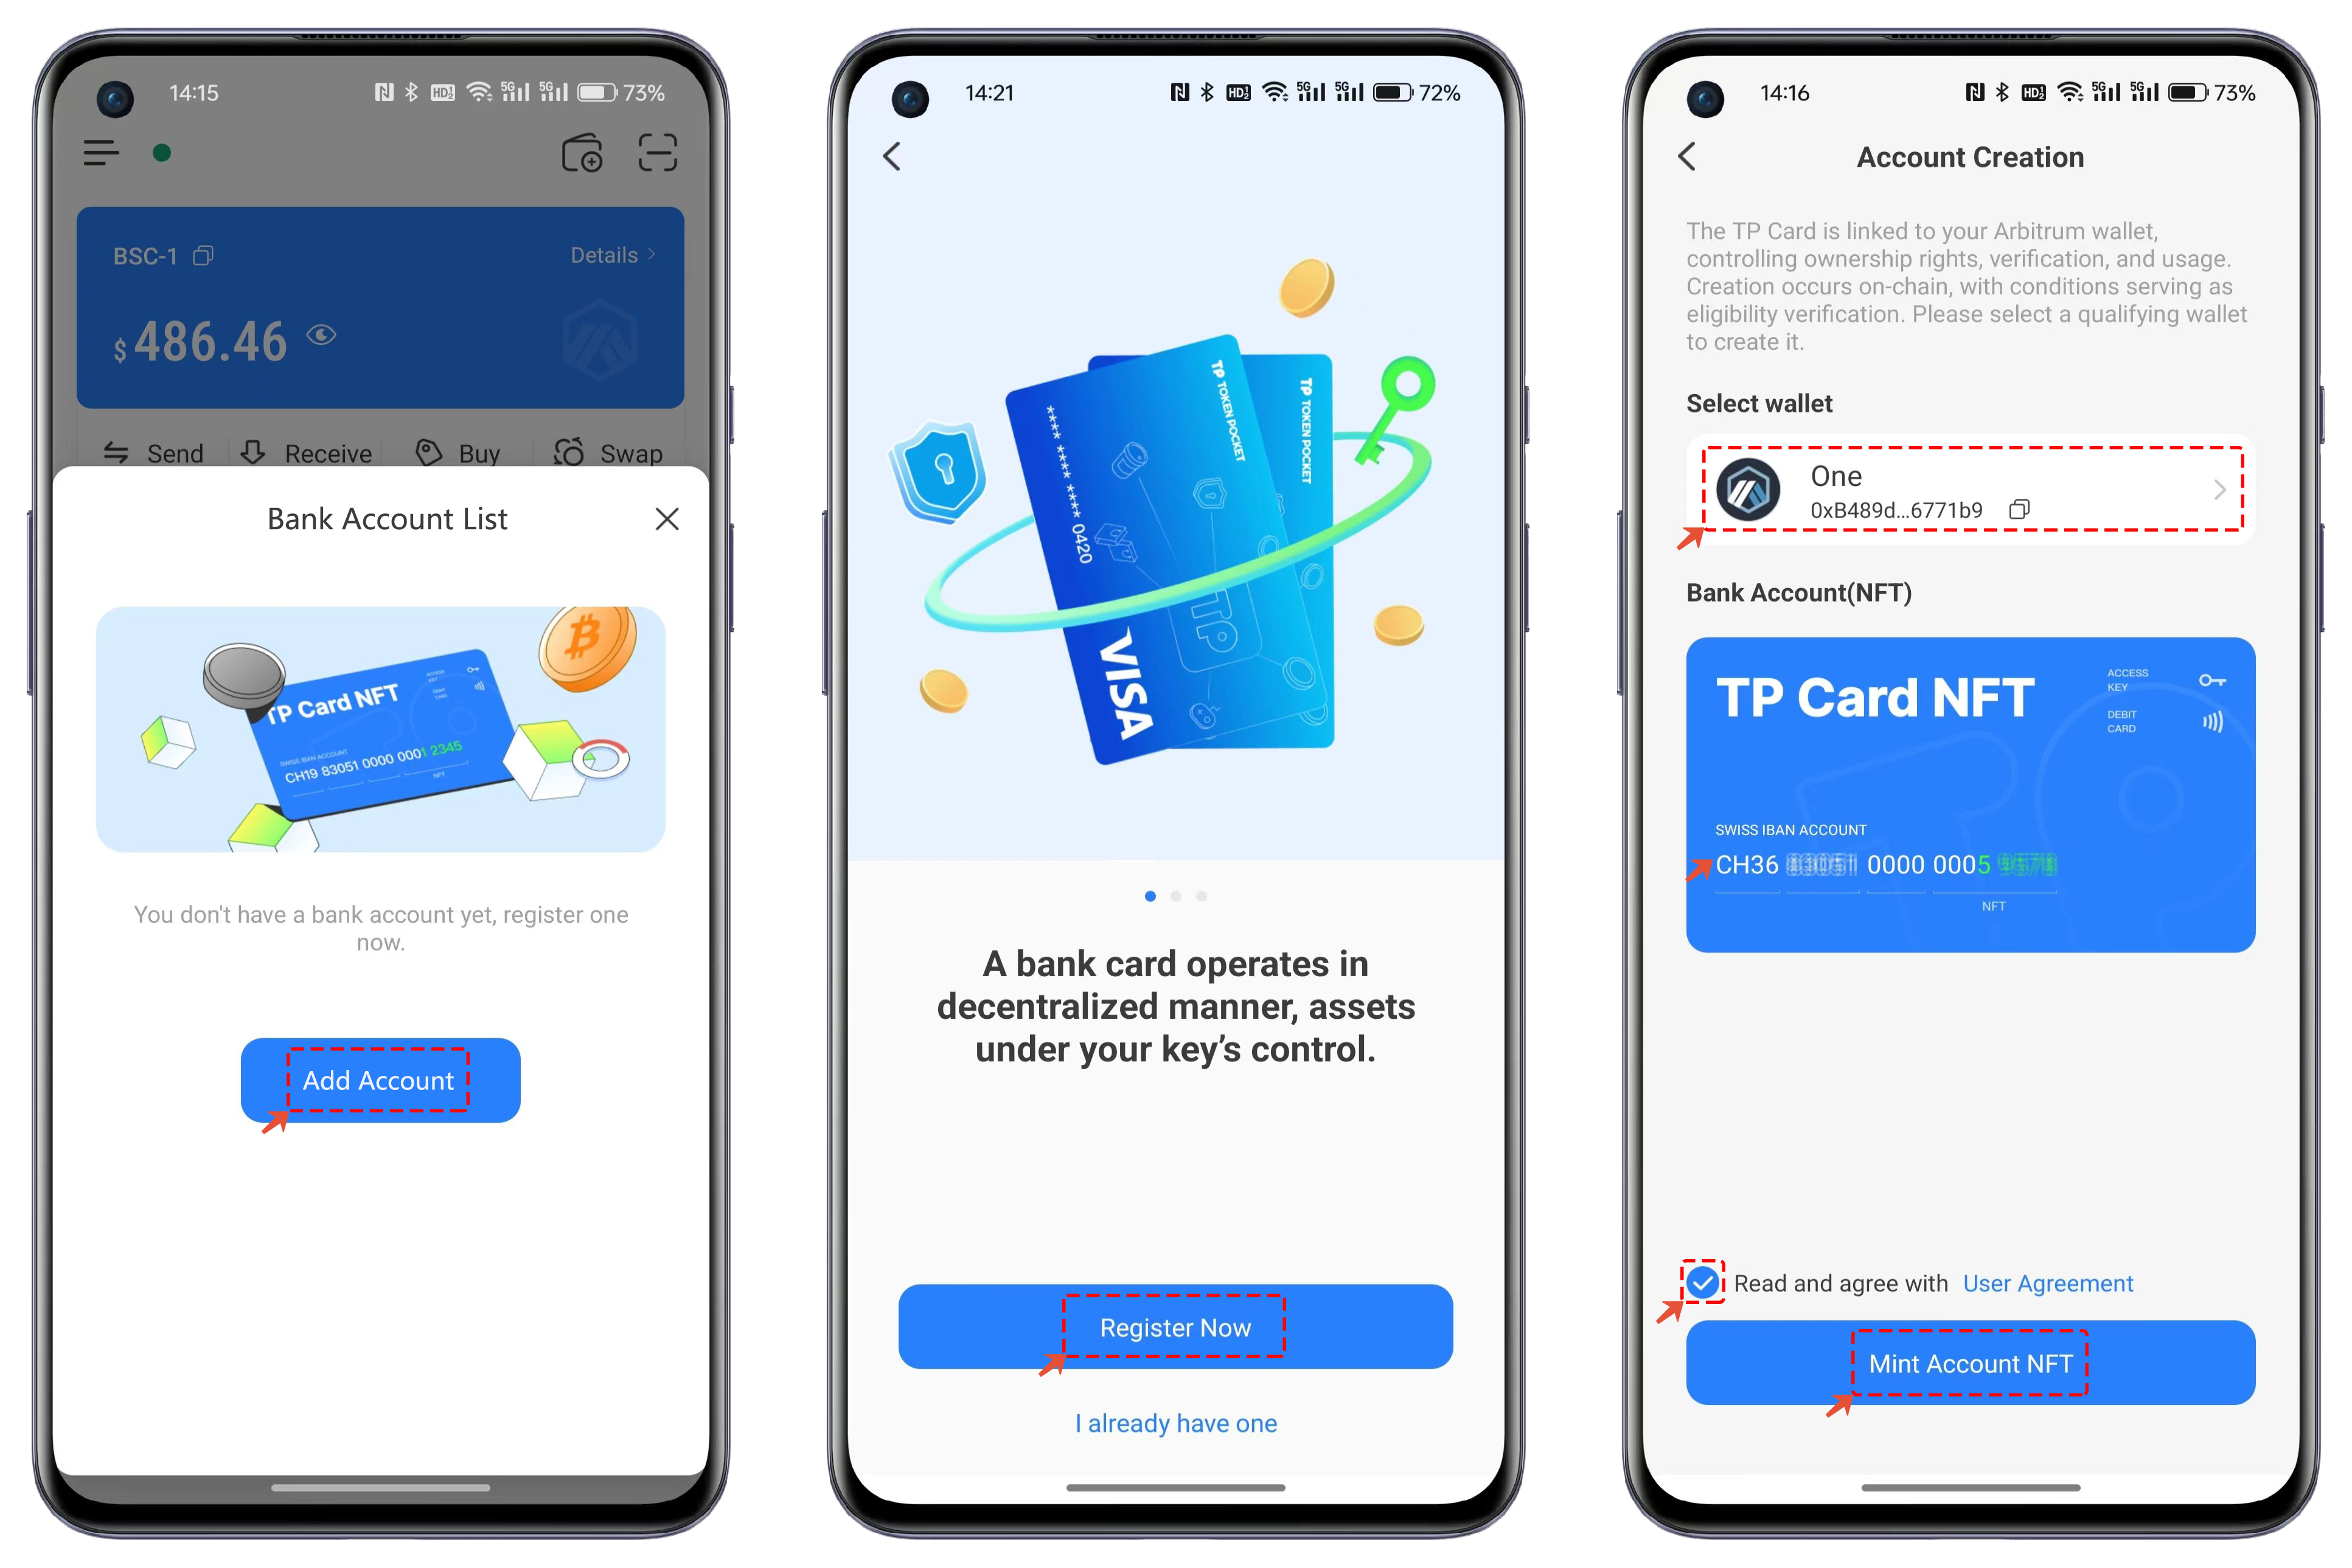
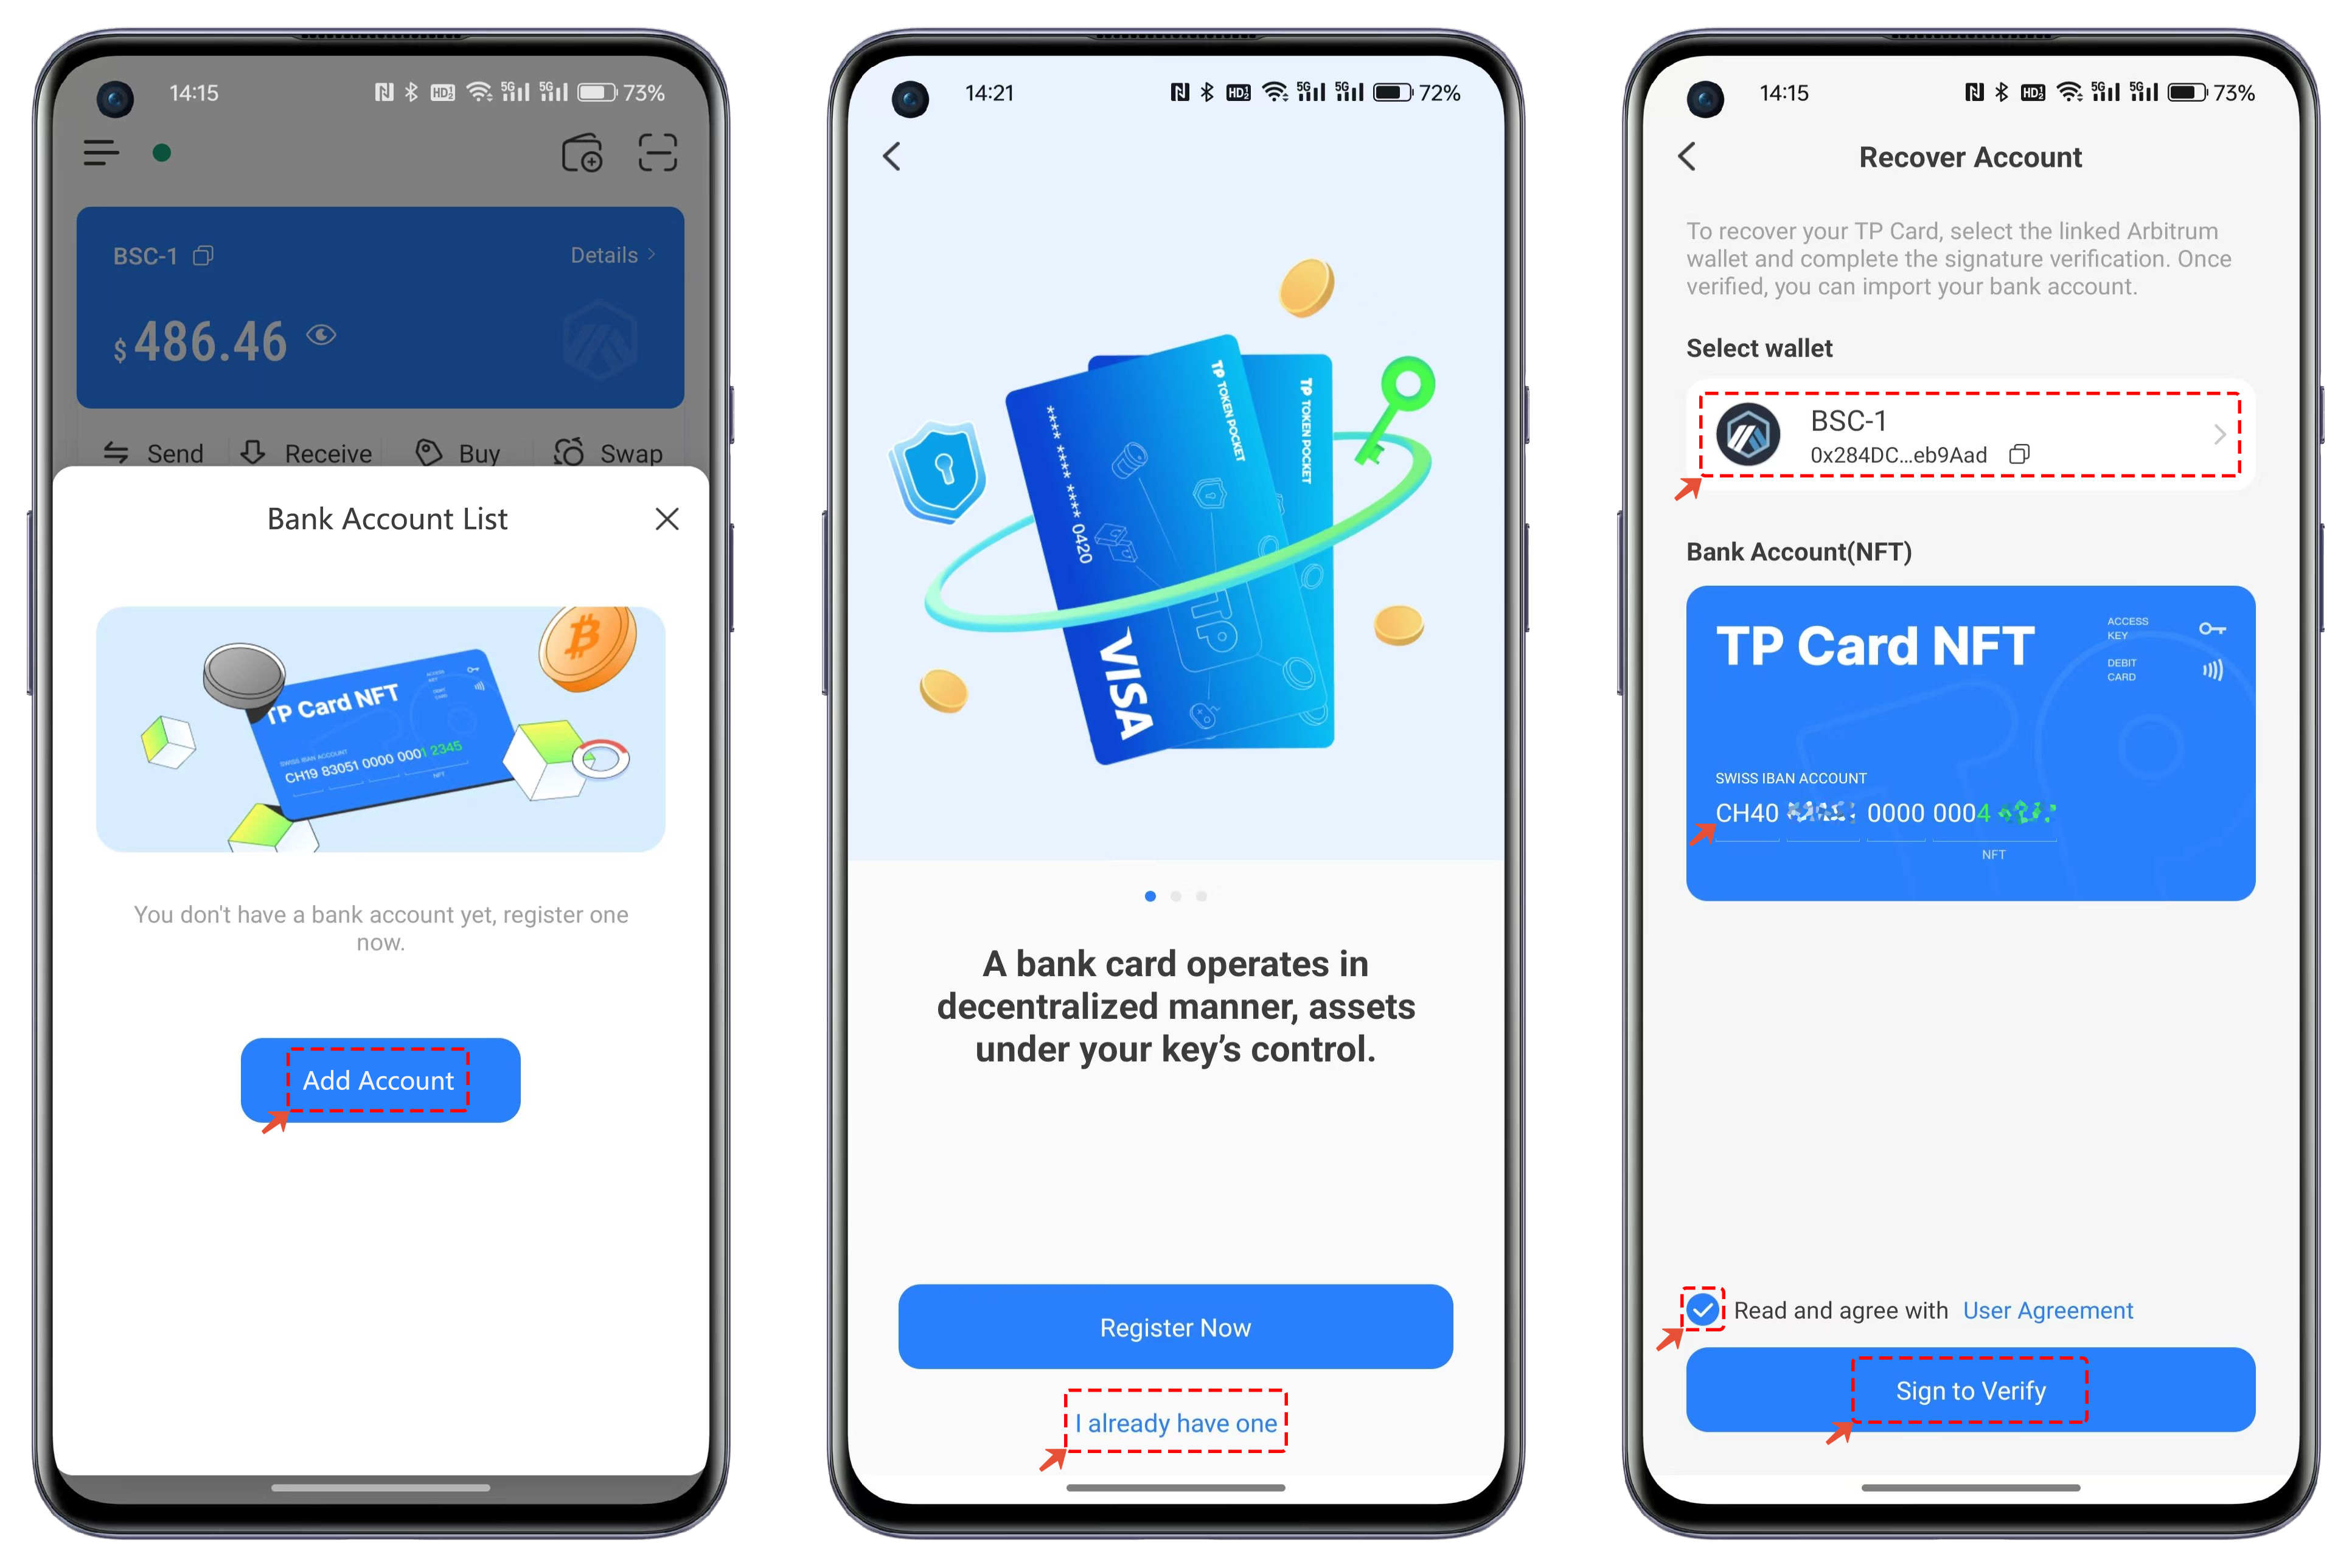
2. Navigate to the \[Bank Account List] screen. Since this is your first time using it, you’ll need to click on the \[Add Account] menu and then select \[Register Now]. In the TP Card creation interface, choose any address with assets in the Arbitrum wallet, and a card will be automatically generated. You can view your bank account on the card. After checking the \[User Agreement], click on "Mint Account NFT."
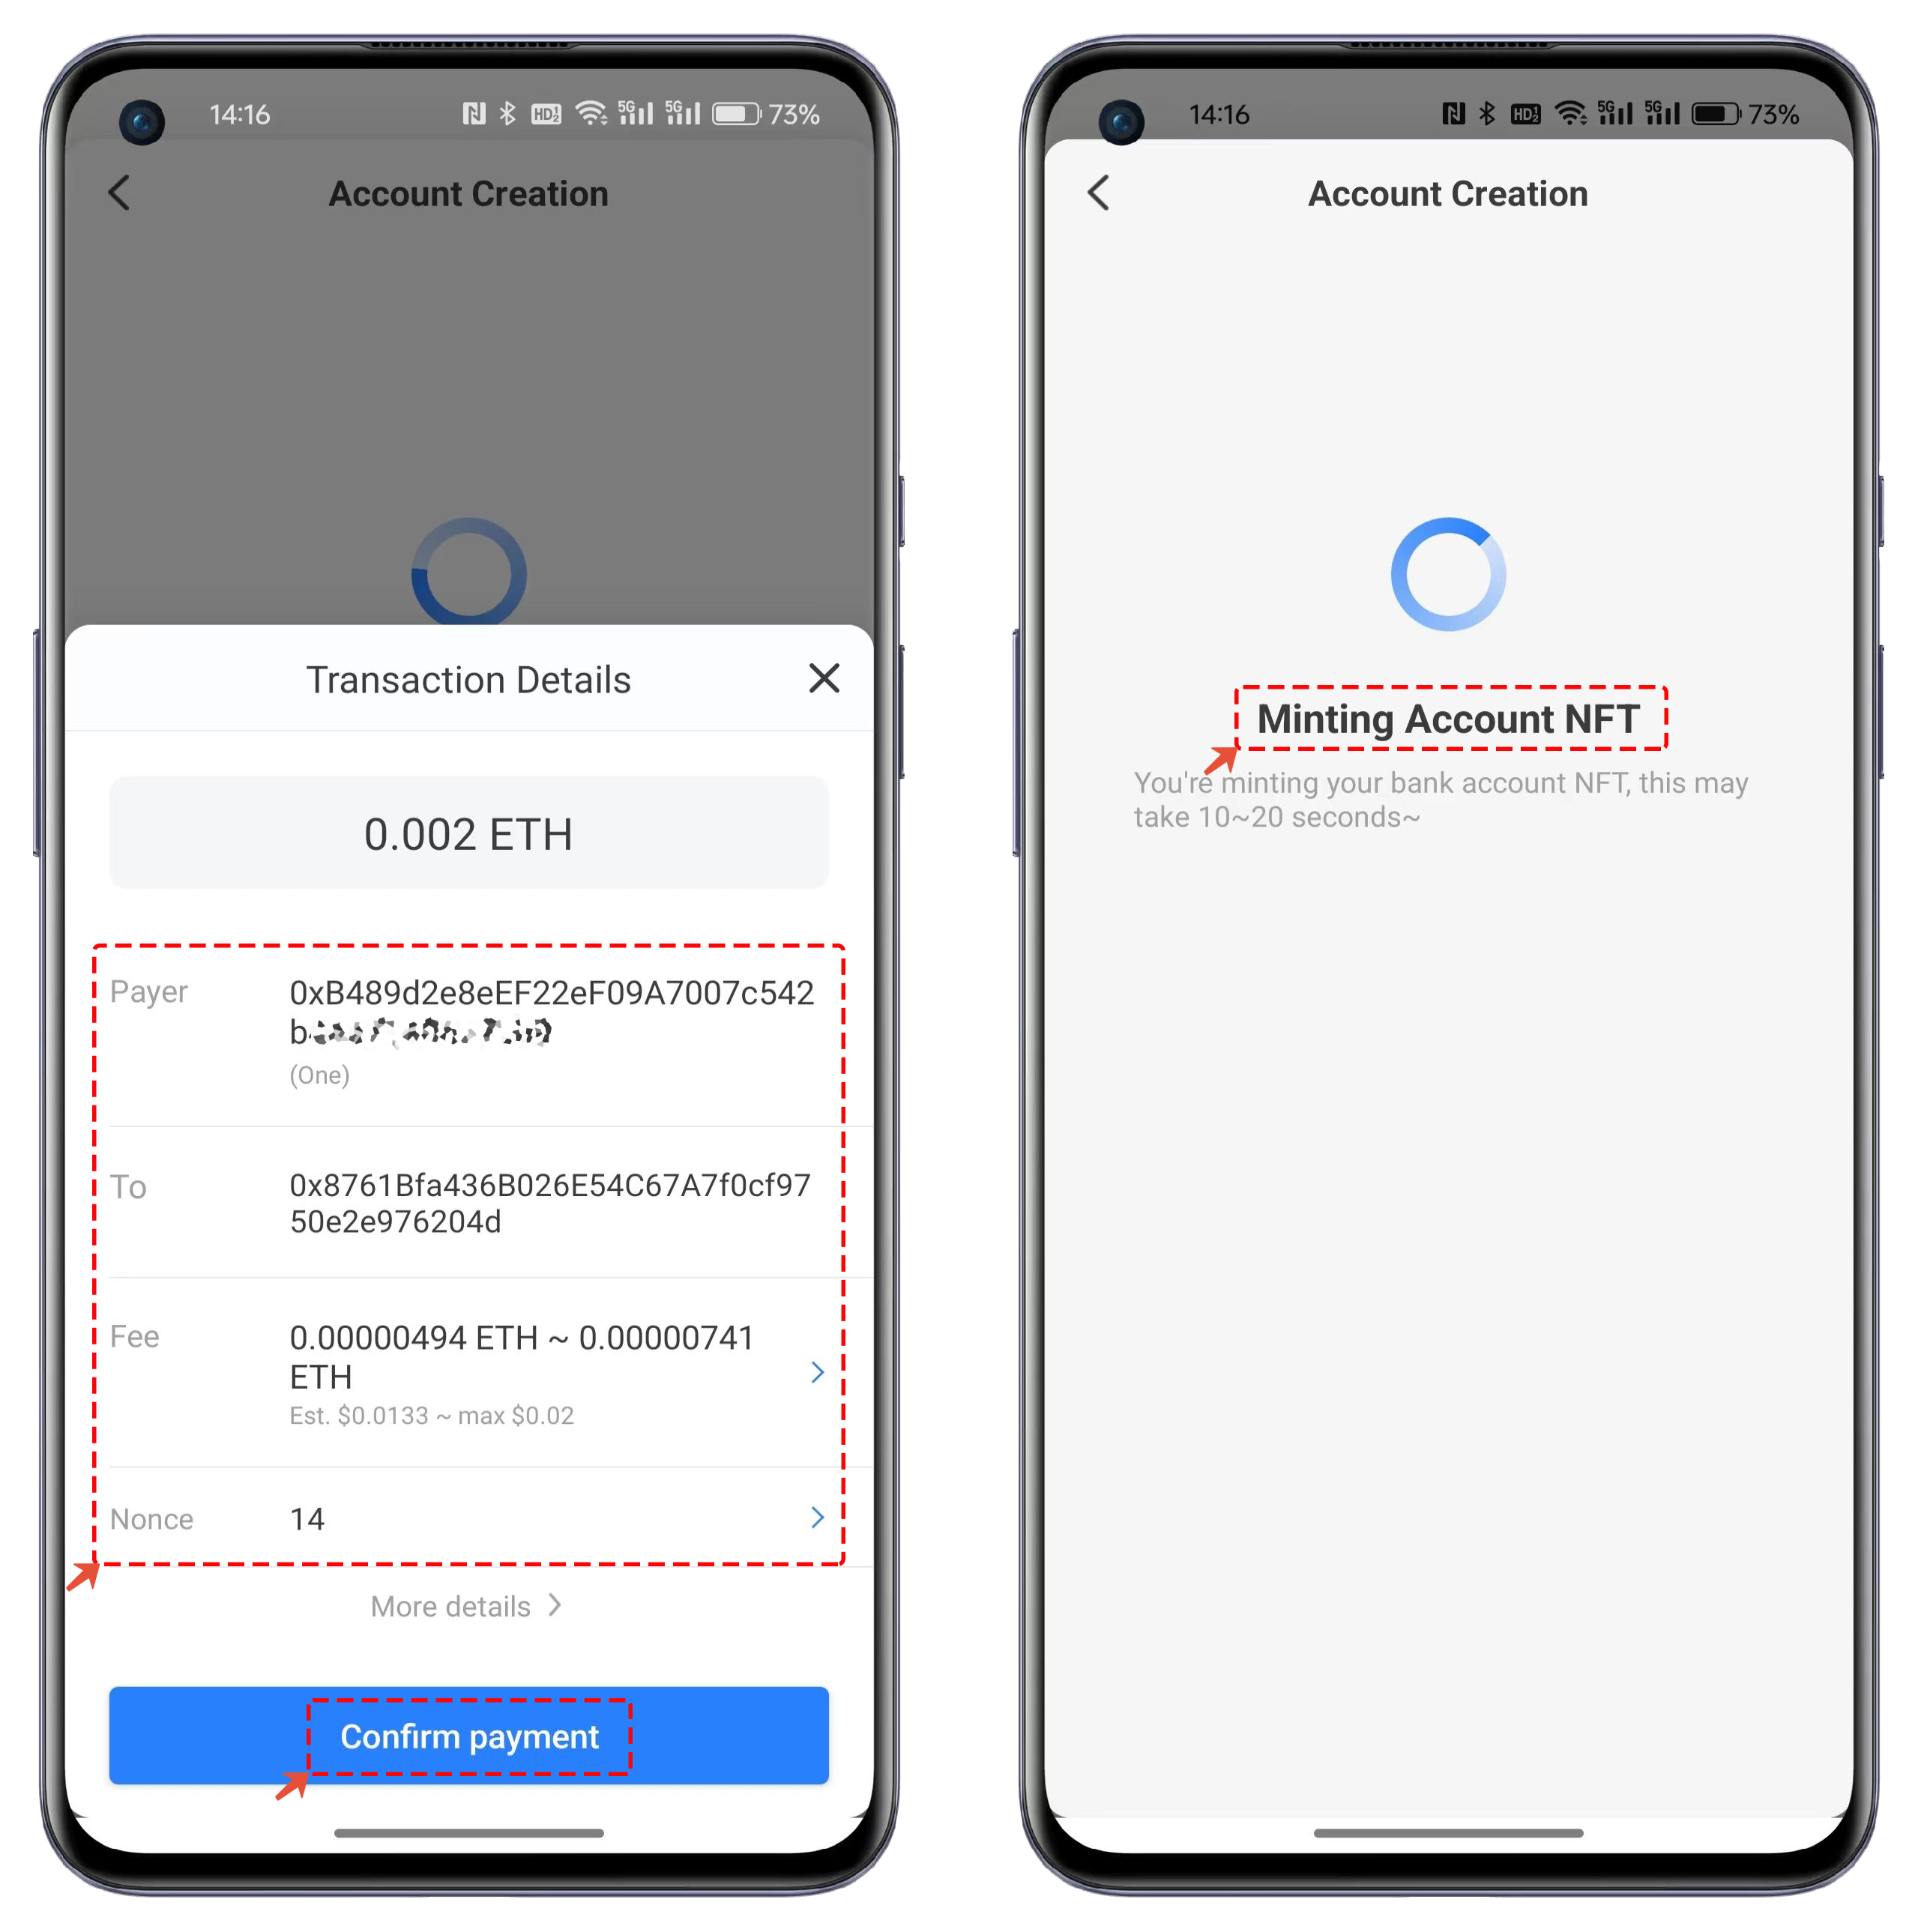
3. Ensure that there is enough ETH in the wallet address to cover the GAS fees for the transaction. After verifying the information, click \[Confirm Payment] and patiently wait for the NFT minting process to complete. This process is usually quite fast.
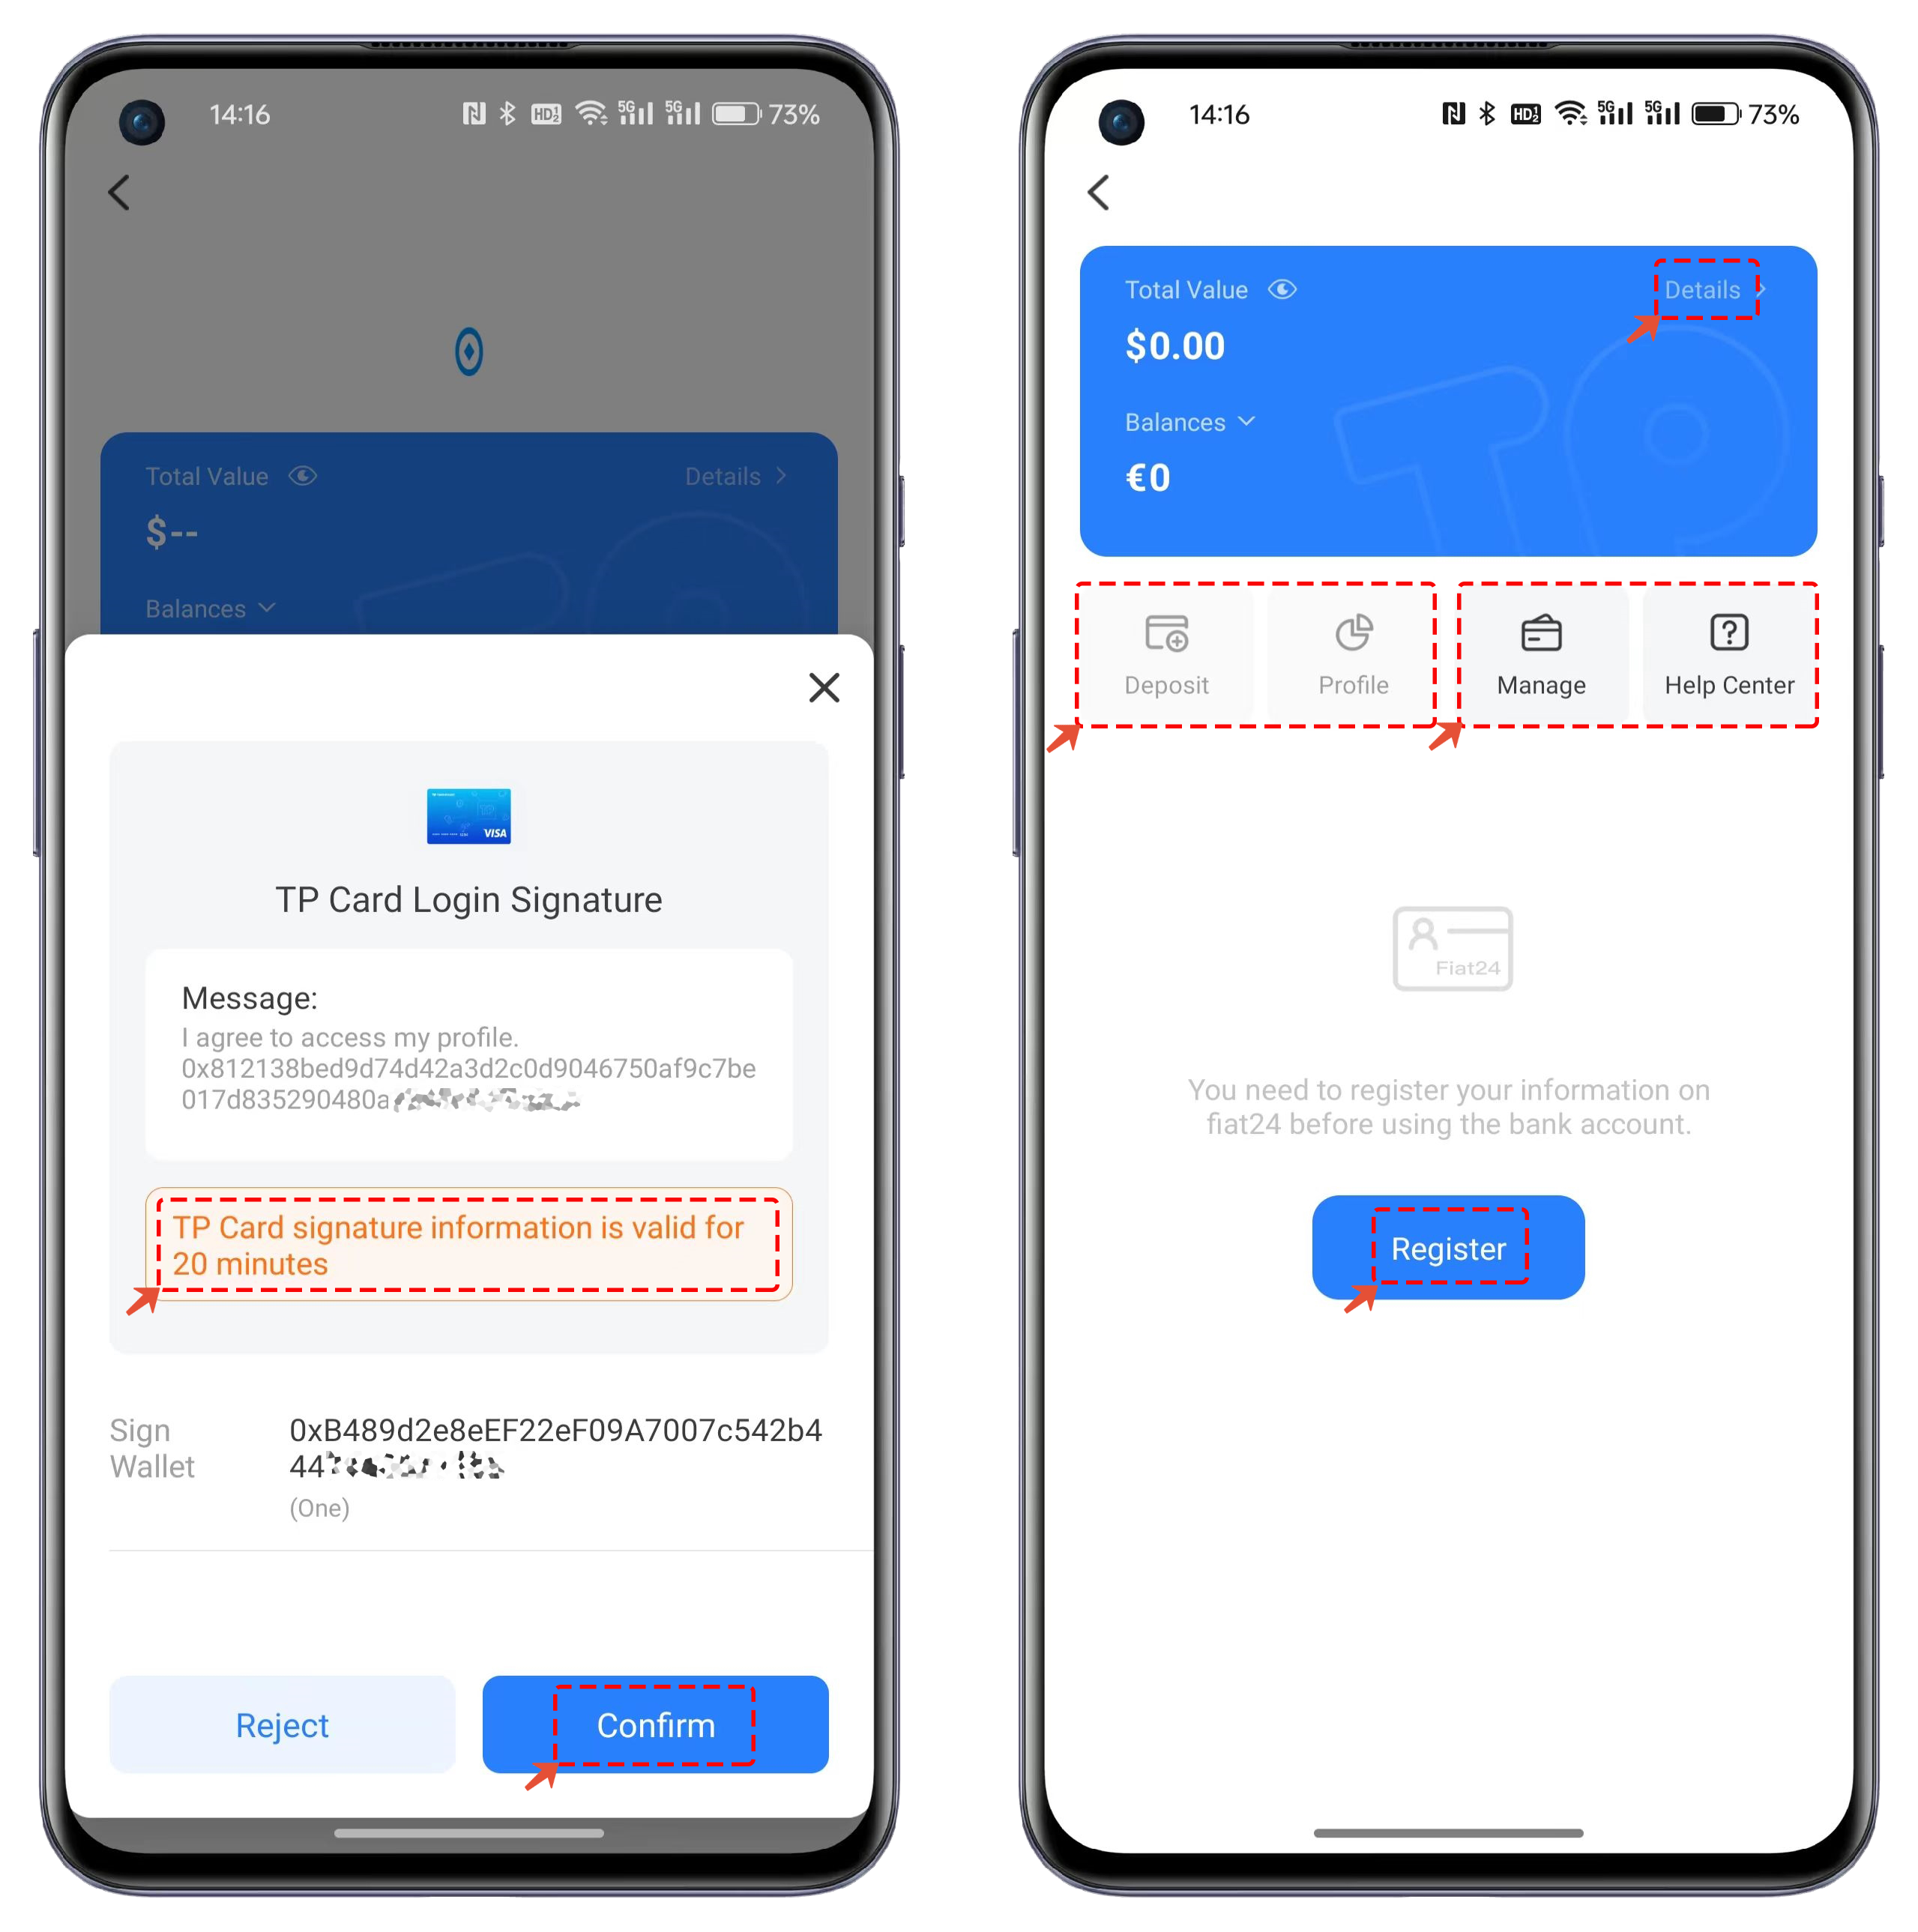
4. After successfully registering, you will need to perform a TP Card login signature. This operation does not require any on-chain GAS fees. Once the signature is completed, the process of creating the bank account NFT is finished.
The functions for managing deposits and spending require you to register for banking services with Fiat24 before they can be used.
### **TP Card Import Tutorial**
1. Open TokenPocket, click on the menu in the top left corner, and access the operation interface through the TP Card entry at the bottom left.
2. Click on \[Add Account], then select \[I already have one]. Choose the address that has previously created a TP Card NFT, and the previously created card details will automatically appear. After checking the user agreement, click on \[Sign to Verify].
3. After verifying the information, click \[Confirm] to complete the signature for the recovery process. You will then see a \[Recovery Successful] message.